Tag Archives: Sheaffer

How Do I Restore a Sheaffer TouchDown

Fixing a Sheaffer TouchDown filler can be easy with a little practice. Personally, I love the functionality and simplicity of the design that uses pneumatics to collapse an ink sac and allow its natural vacuum to draw ink back into the pen.

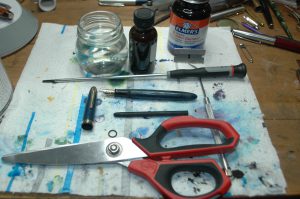
Most of what you need to fix a Sheaffer TouchDown filler is right here in this photo.

In the first photo, you will see almost all that you need to restore a Sheaffer TouchDown filler. We forgot to include a bottle of “Super Lube: O-Ring Silicon Lubricant.” In case you have trouble seeing the photo, you will need: a Sheaffer TouchDown-filling pen, a long-shaft flathead screwdriver, dental pick, scissors, razor blade, a size 15 latex rubber ink sac, an O-ring, sac shellac, rubber cement and jar of room-tempeture water. A couple of Q-tips, paper towels, corn starch and a wooden dowel might also be useful.

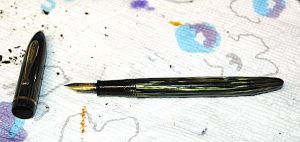
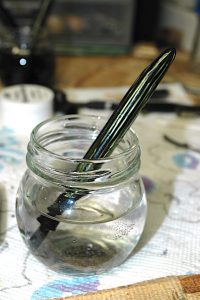
To get started, unscrew the cap from the fountain pen, and stick the pen nib first in water. You do not want to soak the entire pen in water, just up to the division between the section (finger-grip part) and the blue barrel of this pen. Let it soak for anywhere from an hour to overnight. This leaches out most of the old ink and softens any possible glue a past repairer might have used to secure the threaded section to the barrel.

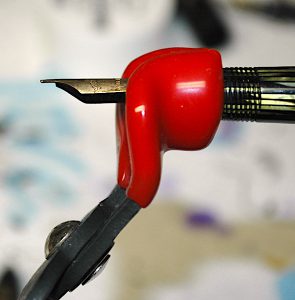
Once the pen is finished soaking, dry it off with a tissue or paper towel. Frequently these pens can unscrew without any assistance from section pliers. Grip the section (finger grip) between your thumb and forefinger on one hand and the barrel with your other hand. Unscrew the section with a steady, gentle pressure counterclockwise (lefty loosey.)

When the section unscrews, you will see the “sac protector” and inner remains of the ink sac come out with the section. The sac protector is friction fit, and you can remove it simply by pulling straight back. Some times the old ink sac has petrified and stays on the section nipple. Sometimes it is in pieces inside the sac protector. Sometimes the old sac has melted to the inside of the sac protector. The first two scenarios are very easy to manage. The melted sac takes a long time to remove. Q-tips, wooden dowels or anything else you can use to safely scrape the inside of the sac protector clean will help. It is very important to remove all the debris from inside the sac protector to allow the new sac to slide in and operate properly.

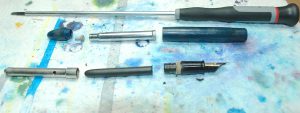
This photo shows a complete disassembled Sheaffer TouchDown pen.

After you have finished with the sac protector, unscrew the blindcap on the tail of the pen barrel and, if possible, pull the blind cap back as far as it will go. (Don’t force it if it is frozen inside the pen.) Now take the long-shaft flathead screwdriver and ease it up the barrel until you can feel the screw at the end of the barrel and metal tube. Turn the screwdriver slowly until you feel it find the slot of the screw. Hold the blind cap tightly with one hand and gently unscrew the screw to the left. You will feel the screw come free. It seems easiest to let gravity help it fall out on to your work bench. With some gentle pressure, the plastic blind cap will pop off the metal tube. Next, you push the tube back down and out the section-end of the barrel.

Until you get used to it, the trickiest part of the restoration is replacing the latex-rubber O-ring in the blindcap-end of the barrel. You can see the black O-ring imbedded in a groove of the barrel in this photo. If you are lucky, the O-ring will still have a little pliability and it will come right out with the help of the dental pick. If you are unlucky, the O-ring will have petrified, and you’ll have to carefully dig it out little piece by little piece.

Once the old O-ring is out, you might want to use a Q-tip to clean out any dirt in that end of the barrel. The barrel on TouchDowns are often still quite clean, and cleaning it with a Q-tip might not be necessary.
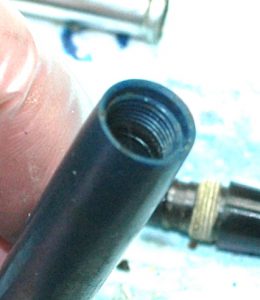
You can see the old O-ring inside this Sheaffer TouchDown barrel. Use a dental pick to carefully remove the old O-ring.

Sheaffer TouchDown fountain pens used one of two different size O-rings. Most pen-part suppliers list them as either a “small O-ring” or a “large O-ring.” Large O-rings were only used in first-year Sheaffer TouchDowns (1948), which have noticeably thicker barrels than the remaining “Thin Model” TouchDowns (1949-1952), which use small O-rings. If you ever feel like dabbling in Sheaffer Snorkels, the large O-rings are also used on PFMs and Snorkel Desk Pens.

I find it is easiest to place the new O-ring into its groove with the dental pick. I fold the O-ring a little and insert it into the blind-cap opening. Then I use the dental pick to carefully get one side of the O-ring into the groove. If all goes well, I use the dental pick to drag the opposite end of the O-ring into the groove. With two-points in the groove, I go the next high point of the sack and work it into the groove. Once that is accomplished, I try to get the last high point of the O-ring into the groove. It sounds easy, but it takes some practice to do it quickly. NEVER lube the O-ring before trying to install it. A slippery O-ring will make your life miserable.

Now it is time to start reassembling the barrel apparatus. Clean off the metal tube you had to unscrew from the blind cap with a paper towel to get any old shmutz off. Then drop the screw threads-first down the tube. Use the screwdriver to help find the tube’s hole for the screw. Leave the screwdriver in the tube slotted into the screw. Put a thin layer of silicon O-ring lube around the shoulder of the tube on the screw-end of the tube. Then insert the screw and tube, screw first, into the section hole of the barrel and gently glide it with the screwdriver all the way through the blind-cap side’s hole in the barrel until the tube won’t go any farther. Rest the barrel and tube on its side with the screwdriver still slotted into the screw.

Take the plastic blind cap and fill its cup with rubber cement. (There should be a rubber washer in there, but often it is blown and the rubber cement acts as a sealant that can replace it.) You might find a way that works better for you, but I hold the blind cap with the rubber cement in my left hand and pick up the barrel assembly by the screwdriver with my right hand. It gets a little messy, but I then screw the screw into the blindcap. You know you have found the screw hole in the blind cap when you see the tube going into the blind cap’s cup and rubber cement starts smooshing out. It is important to make sure the screw is in tightly, but you have to be very careful not to overtighten the screw because it can split the blind cap in half and make it useless for the necessary air seal to make the filler work. It is important for the tube to be extended all the way to prevent the rubber cement from getting into the O-ring. Wipe the excess rubber cement off with a paper towel. Now you can work the tube back and forth to spread the silicon lube around the O-ring and get smooth operation from the barrel assembly.

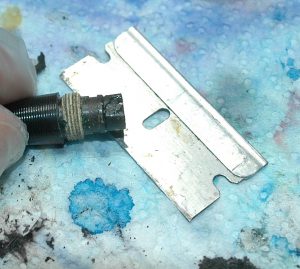
Here you can see where the hardened ink sac has been scraped off to reveal the nipple underneath.

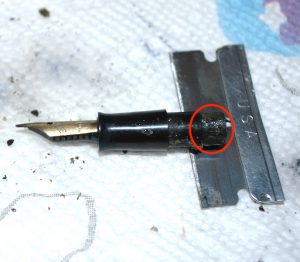
Getting back to the section assembly part of the pen, take the razor and clean the usually hardened old ink sac off the nipple of the section. Be very careful not to accidentally chip off a piece of the nipple. That will ruin your pen. Some people will insist you need to give the nib assembly a sonic cleaning at this point, but if you soaked it long enough, you likely already removed most of the old ink.

To move forward, you need to trim your ink sac to fit perfectly into the sac protector. I don’t have a definitive way to do this. I usually stick the sac (closed end first) in the sac protector, pinch it at large opening of the sac protector, pull out the sac from the protector while maintaining the pinch and then trim it with scissors. Make sure the nipple on the section is dry. Put the sac on the nipple and then put the ink sac protector over the sac to see how well it fits. If the sac is a shade too long, trim it just a bit more. If the sac is a millimeter or so short, that is perfectly fine. Remove the sac protector and then ink sac. Paint a thin layer of sac shellac on the nipple of the section and then replace the properly trimmed ink sac. Wipe off the excess shellac and let the assemble dry for a few minutes. Next rub down the ink sac with pure talcum powder (old skool and potentially cancerous, as talc is mined with naturally occurring asbestos) or corn starch. The corn starch (or death talc) helps preserve the rubber. Snap the sac protector into place over the sac.

Final assembly is easy. Screw the section back into the barrel in a clockwise (righty tighty) fashion. Some old manuals say that you should put rubber cement on the threads (you can see the remains of old rubber cement on the starting photos) to help seal the barrel, but it isn’t necessary and only gives future restorers a bigger headache. The threads seal the section and barrel nicely on their own.

At this point, you have a pen that is ready to write. I, generally, give the pen 24 hours to let the shellac set completely. Then I test it with water, flushing out any remaining old ink while making sure it fills properly.
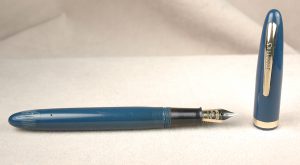
If you want it to looks its best, you can do a wet sanding that will remove a thin layer of the plastic, removing most surface scratches and stains. It also can enhance the color a bit. Unfortunately, it also makes the remaining imprint shallower or removes it entirely, which is a reason to be judicious in deciding which pens to wet sand. Yet, how to wet sand a pen is worthy of an article on to itself.

Loose Ends Ink Test

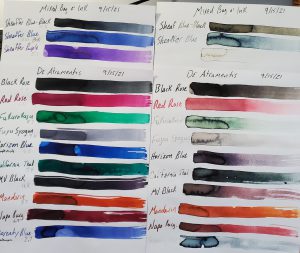
While wrapping up our ink tests in 2021, we had a bunch of loose bottles of ink that we tested on the same pieces of Rhodia paper to save paper and space. I left these test samples in the window for six months, and Dawn and I calibrated and tested the pH on these samples at 75.6-degrees Fahrenheit and 50% humidity.

Check out how UV light effected our hodge-podge selection of ink by Sheaffer, DeAtramentis, Iroshizuku, Monteverde and Waterman

As always, we found the results interesting. However, these results are simply raw data. How the chemistry of the inks reacts to the chemistry of a pen’s ink sac or converter is not necessarily dictated by the pH level of the ink. For example: You’ll see below that Waterman Serenity Blue is very acidic with a pH at 2.7, but we’ve used it in vintage pens for years without it doing anything other than standard wear on ink sacs over 5 to 10 or more years. Many dealers other than myself find Waterman inks to be a gold standard of safety for use in vintage pens.

You can see in the photo that most of the ink fared poorly in the light-fast UV test. The Sheaffer inks were the Czech Republic-made variety in blue-black, blue and purple. Their colors are quite pretty when freshly dried. UV light makes the blue-black a faded black and grey. Blue fades badly to a blue-black, and the purple almost complete disappears!

De Atramentis Black Rose holds up reasonably well, though it fades a little. Red Rose fades by about 50%.

We had 2 leftover Iroshizuku inks. The green Fukurokuju is a lovely Irish mint of a color, but it fades really badly in UV light. I’m also a fan of the medium-grey Fuyu Syogun, which has hints of purple and blue. Unfortunately, it fades to almost invisible.

Up next were our first looks at bottled Monteverde ink. Blue Horizon and California Teal are both gorgeous. If you lay it down too wet, it has some nice sheening. Yet, the blue faded to purple and the teal turned grey! Monteverde Black faded heavily to a reddish-grey. Amazingly, Mandarin orange held its color really well. Napa Burgundy faded a bit but generally held its color better than most of the other Monteverde inks.

Last but not least was Waterman’s Serenity Blue. Just about every expert I know insists it is the same formula as Waterman’s Florida Blue, but I swear I see a change. Unfortunately, it behaves much like the old Florida Blue by fading pretty drastically in the sun.

Please look below for the pH readings on all of our inks tested. As a quick refresher, 0 to 6.9 is on the acid side of the scale, with 0 being the extremely corrosive end of the scale. 7 is pH neutral, like pure water. 7.1 to 14 is alkali or base, with 14 being the extremely corrosive side of that half of the scale. Again, our pH results don’t guarantee that the ink is corrosive in your pen, as the chemistry of the ink might mix differently with the chemistry of your ink sac or converters.

SHEAFFER:
Blue-Black                    4.5
Blue                                3.6
Purple                            5.1

IROSHIZUKU
Fukurokuju                   8.7
Fuyu Syogun                 9.6

MONTEVERDE
Horizon Blue                6.5
California Teal              7.4
Black                               4.4
Mandarin                       7.7
Napa Burgundy            6.9

WATERMAN
Serenity Blue                 2.7

Shopping for a Sheaffer PFM

The Sheaffer Pen for Men, more commonly known as the Sheaffer PFM, was a luxury fountain pen first released in 1959. Like the Ford Edsel, it wasn’t quite as popular in its time as it should have been and was made for only several years. Years later, it has become an iconic pen for vintage pen collectors.

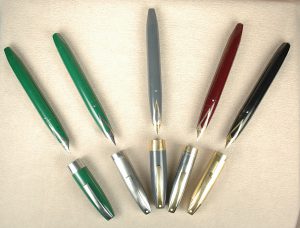
From left to right are a Sheaffer PFM I, II, III, IV and V. Notice the changes in the caps and nibs.

Keeping a car analogy in mind, PFMs came in 5 trim lines counted out in Roman numerals: I, II, III, IV and V.

• SHEAFFER PFM-I—This was the most basic and inexpensive trim line. It sports the same plastic cap and body as in higher trim lines, but the cap clip and band are steel, instead of gold plate. Its inlaid nib is made of “palladium silver,” which today is likely more valuable a precious metal than gold. All trim lines of the pen filled with a larger version of the Sheaffer Snorkel filler.

• SHEAFFER PFM-II—This pen was identical to the PFM-I except for its cap. The PFM-II cap was made of steel. It also should be noted that the palladium nibs feel much firmer than their 14k counter parts.

• SHEAFFER PFM-III—Some collectors choose to focus the most on these pens, as they were a gold upgrade with a matching plastic cap and barrel. The cap trim was gold plated and the nib was an inlaid 14k gold nib. Many collectors find these nibs to feel a little softer and smoother.

• SHEAFFER PFM-IV—PFM-IVs sport a polished chrome cap with gold plated trim. You also spot a flat gold-plated plate on the back of the blind cap. The rest of the pen remains the same as the III.

• SHEAFFER PFM-V—The pinnacle of the line, Vs were the same as IVs, except they had a completely gold-plated cap that featured an etched pattern reminiscent of the New York skyline.

In addition to the five standard trim lines, Sheaffer made a “Demonstrator” version of the pen so that pen stores and traveling Sheaffer reps could show how these complicated fountain pens worked on the inside. These pens were not for sale to the general public and were made in very small quantities. Worse still, their fragile clear plastics are known to get little cracks in them called “fractals.” The pens, which are effectively PFM-III models that are clear, are valued on clarity, internal ink staining, cracks like a normal pen and these little fractals.

An average to bad PFM Demonstrator might still command more money than a PFM-V, which normally gets more money than the other trim lines. A near perfect Demonstrator can cross into $2,000-plus territory in the year 2023.

In addition to the clear model, PFMs came in black, blue, burgundy, green and grey. Grey seems to be the rarest of the colors and also commands the highest prices. A PFM-III in grey would likely get more money than a grey PFM-V because the grey caps are so hard to find.

Cracks in the pen are the bane of collectors’ everywhere. Sheaffer, and the world, was still experimenting with plastic. The plastic chosen by Sheaffer for the PFMs tends to get increasingly brittle with age. When shopping for a Sheaffer PFM, you want to look very closely for tiny hair-line cracks in both ends of the barrel, at the start of the section nearest the barrel, around the inlaid nib and under the nib around the feed area. A crack in the barrel all but guarantees that the pen won’t fill properly, as there will be too many air leaks for the pneumatic filler to function properly. Cracks around the section and nib might equate to seepage of ink. This bothers some people more than others.

Sometimes, whatever held the inlaid nibs in place to begin with starts to deteriorate, and the nibs can seep through no fault of anyone. Yes, PFMs are a little more high maintenance and problematic than many other vintage pens, but they can also the pen you want to turn to most.

Restoration of these pens is a bit complicated, as are all snorkels. The O-ring and sac replacement are basically the same as the thinner, earlier model Snorkels. However, the PFM requires a special tool to unscrew a part of the section to reveal an inner chamber to replace the point seal. Larger O-rings and Point Seals are required for PFMs compared with standard Sheaffer Snorkels. Replacing the point seal can be challenging and risk cracking the section through no fault of a restorer. Don’t be surprised to see restoration costs span $50 to $75 for a simple overhaul with a new sac, O-ring and point seal. Those 3 parts are cheap, but you are really paying for the extra-time and expertise that go into fixing these pens.

Reading ‘100 Years of Sheaffer’

One might think that a book written by the Sheaffer corporation about the Sheaffer corporation might be a definitive history of the company, but one might be wrong.

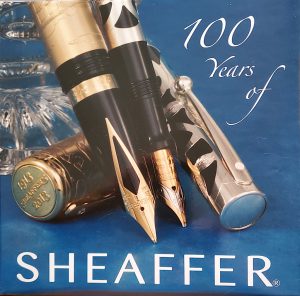
This is the book cover to “100 Years of Sheaffer.” It is a very attractive coffee table book that seems to get some of the facts and history muddled if not completely wrong.

“100 Years of Sheaffer” is a beautiful coffee table book published by Sheaffer in 2013 to celebrate the first century of the company from 1913, when it officially incorporated, to the then present 2013. The pages are thick and the photography is excellent. Clearly, Sheaffer intended for this book to last another 100 years.

Unfortunately, the information inside the book isn’t as accurate as one might hope. At the time, the Sheaffer Pen Company had been owned by Bic, after changing hands a few other times since the Sheaffer family sold it in the 1960s. Perhaps, their own archives were diminished or this became a side project that was more of a nuisance than a labor of love.

The book opens with a few bland, general statements by Bic chairman Bruno Bich; John D. Sheaffer (the founder Walter Sheaffer’s grandson) and Sheaffer’s general manager Tim Williams. Then the uncredited author begins the narrative for the book. True Sheaffer experts will be upset by some glaring mistakes, such as ignoring the Sheaffer Touchdown filling system and then calling those pens the Snorkel and Snorkel Thin Model of 1949 and ’50 and then getting into how the Snorkel was put on the market in 1952. It also discusses how the famous Sheaffer inlaid nib was first introduced on the Pen for Men, when I’m pretty sure it got its debut with the Sheaffer Compact pens a year or two earlier, which aren’t even mentioned in the book, which is surprising given how they were early cartridge pens. Much of the information in the book is accurate, but these inconsistencies and omissions chip away at its credibility.

Each chapter focuses on a decade of Sheaffer production, and it starts with a brief overview of the history of that decade. Yet, they seem to get some basic history a little wrong, too. As the history is more pop-culture based, it is weird how they refer to the movie “King Kong” as an early Technicolor film, in the same sentence with “Gone with the Wind” and “The Wizard of Oz.” The latter two films were famously early color films from 1939, while “King Kong” was a black-and-white film from 1933. In the 1940s section it discusses how Humphrey Bogart and Ava Garner became huge stars in the classic film noir movies “The Maltese Falcon” and “Casablanca.” Yes, Bogie became a household name for his performances in those films, but Garner didn’t appear in either of them. True fans of noir would also never consider “Casablanca” film noir, either.

While similar books focus heavily on identifying pens based on their production dates and model names, this book doesn’t get into as many of these details. It does feature some great pens and samples of original advertising, but the very best examples are of the pens and ads come from the Bic era from 1997 to 2013. Even though I cannot prove it definitively, it seems as if they get the production dates wrong on some of their own pens of that era.

The general errors in the book should have been corrected before publication, as the true facts were already well established and known by pen collectors in 2013. Another surprising element of the book is that many of the pens photographed were not cleaned up. While they might have been from Sheaffer’s archives, many were tarnished and/or even showing some corrosion on the metal parts. By 2013, there were already many well established vintage pen repairers who could have gotten those pens gleaming for their big day with the camera. The photos were well lit and focused. It just seems as if they could have done a better job prepping the pens for such an important book.

In the final analysis, it is a well-made book with some good information. Unfortunately, you can’t trust it as the definitive source material identifying and dating Sheaffer pens.

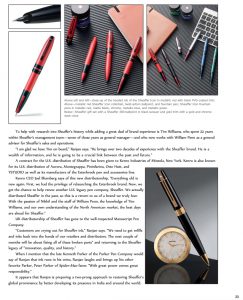
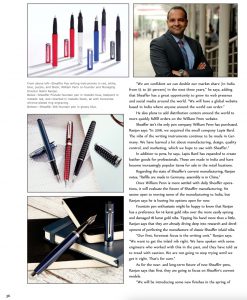
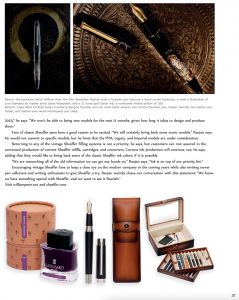
Pen World: Sheaffer’s Future in India

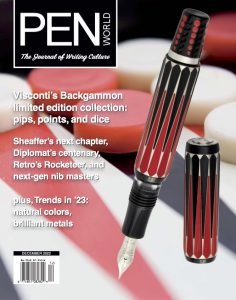
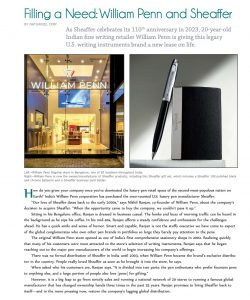
Cross sold the Sheaffer Pen Company to a company in India called William Penn. “Pen World” magazine asked me to get to the bottom of this news event by interviewing the owner of William Penn, a smart, hard-working entrepreneur named Nikhil Ranjan. If you ask me, Sheaffer is in better hands than it has been in decades. Read all about it in my December 2022 story from “Pen World,” reprinted here with permission from editor Nicky Pessaroff. If you want to stay on top of all my stories and the rest of the news in “Pen World,” be sure to click here to subscribe. To more easily read the story below, click the individual images of the pages.


Pen Collecting Time Capsule

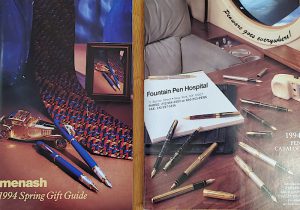
Here are two 5″ X 7″ pen catalogs from 1994! I was intrigued by the Menash catalog as I don’t know what became of that company.

Leaving the pen-collecting life behind, a friend of mine has given me his stash of catalogs and advertising from 1992 through 1994. Its contents blew my mind.

Most of the material was from 1994, the spring I graduated high school. While it is difficult for me to comprehend that was 27 years ago, what is harder to comprehend was how big pen collecting was becoming that long ago!

I found my first fountain pen in 1985 when I was 9 and adored it. It belonged to my late grandfather, and it still worked: a 1928 Sheaffer Lifetime Balance. I used it until it finally broke down, and I became obsessed with finding other fountain pens. They just didn’t exist. Not in my 10-year-old world or the various circles I moved in. I asked adults for them, and all the adults laughed and said they threw their fountain pens out years ago because ballpoints were “so much better.” Even then, I knew that was heresy.

Sheaffer sent me an Imperial to replace my grandfather’s pen, which they could no longer fix. I snatched up those terrible Sheaffer Student Pens at the grocery store. Yet, I was the only person of any age I knew who loved fountain pens. Studying German while in a San Diego high school, my teacher told us that most German kids and adults still preferred using fountain pens. San Diego had no pen stores that I knew of, and the internet did not exist. I worked a part-time job and saved most of my money to pay for my trip as an exchange student to Germany. Most of my fellow American exchange students saved up their money so they could drink heavily in a nation where the drinking age was 16. I begged my German family to be taken to a proper stationary shop. I gleefully purchased a stub-nibbed elegant black Rotring and a bottle of Pelikan royal blue ink. I wrote with that poor beast until its threads wore off. It wasn’t until the internet got more advanced that I could search for fountain pens and finally start finding them in about 2005.

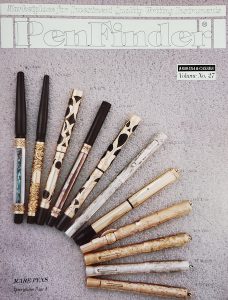
A 1992 edition of “Pen Finder” by Glen Bowen.

And sooo, it surprises me now to see that while I was searching the world over for fountain pens, there was a ground swell of people who did still love fountain pens…and vintage pens, at that! Plus, many of the people I know on the pen show circuit were innovators of the vintage pen revival.

For example, when I first met Glen Bowen, I did not know he founded “Pen World” magazine. He had already sold his stake in it, but his wife Susan was still the circulation director at Pen World. She and I bonded over the fact she went to journalism school at Northwestern with my father. When she later introduced me to Glen, I thought he was just a pen newbie helping his wife at the Pen World table. Ooops!

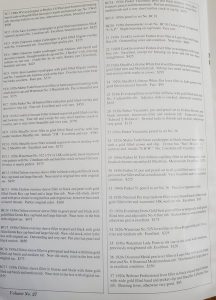
In this stack of publications is a protean “Pen World” magazine catalog he published in 1992 called the “Pen Finder.” It was printed at the same time as the early “Pen Worlds” but was a catalog of vintage pens he restored that collectors could buy. You had to subscribe to it. There were simply several glossy photos of capped fountain pens and some inner pages that served as an index of what the pens were and how much they cost. No nib photos. As people didn’t yet know the history of the pens as well then as they do now, I think I even spotted a few pens with mismatched caps and barrels.

The catalog index of pens for sale in “Pen Finder.” Back then it was too expensive to print color on every page of a magazine. As such there would be color pages and B&W pages.

Without the internet, vintage pen research was a slow and ongoing process. So many of those early collectors had to do their own research into the histories of pens. And much of that was very hit and miss. The internet really made it easier for everyone to get together and compare notes and research.

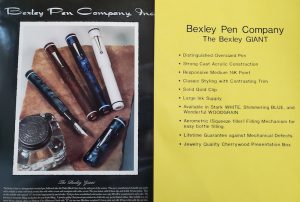
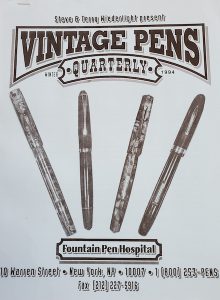
I love the low-tech feel of these publications. The world-famous Fountain Pen Hospital vintage pen catalog was just a photo-copier copy of pens and prices. Bexley Pens advertised new models with a beautiful glossy photo paired with a home-printer list of features and benefits.

The more professional catalogs for new merchandise were more sophisticated, but I sure as hell wish I could get my hands on some of this Montblanc and Omas at their original pricing. Brand-new, factory-fresh Montblanc 164 Classique models for $99. Omas fountain pens for $325 to $100! FPH was selling a stash of 14k gold #5 Waterman MUSIC NIBS for $50 a piece!

Vintage pen prices were all over the map. There were rare pens for $100 or $200. Really common pens for up to $800. And, yet, other pen prices haven’t changed. Standard Parker Vacumatics went for around $125.

Ads for the Bexley Giant. Note the glossy one-page sheet paired with a home-printer fact sheet. That was not unusual advertising back then. It was fairly slick and affordable.

When I finally got some guidance from my buddy Hans who taught me about vintage pens and how to repair them in 2005, I felt like we were the last two people on earth who loved old fountain pens. With his instructions, I felt as if I was somehow reinventing the wheel or reviving a long dead religion. Yet, this is evidence I was never truly alone back then. I was just searching in all the wrong ways and places.

It is easy to be glib and say, “Oh, gee, I wish I knew in 1994 what I know now.” While that wouldn’t be untrue, I really wish I knew my pen tribe then and could take the journey with them to where we are today. Fountain pens have always brought me joy, and they clearly bring many other people joy. And while I am very happy we have found each other in this grand and glorious age of the internet, it would have been nice to have learned and shared at an even earlier age.


Arkansas Pen Show or Bust!

Honestly, I haven’t even caught my breath from the Baltimore Pen Show, and now I’m heading out the door to attend the Arkansas Pen Show in Little Rock! Wowzers!

If you are anywhere within a few hundred miles of Little Rock this weekend (March 13 – 15), you have got to come out and see the Arkansas Pen Show. It is the biggest little pen show in the world! It is

A.) Hyperfriendly
B.) Very Well Organized
C.) Loaded with Amazing Vintage & Modern Writing Instruments & Ephemera
D.) Chocolate Bacon! Vanness Pens, who is the most famous ink seller online, hosts an after-hours party in its shop every year, and they always have a healthy supply of chocolate-dipped bacon. If you have never had such a delicacy, I can understand if you are skeptical. But, once you’ve had one bite, you will be addicted and a choco-bacon believer.
E.) Springtime! Every year I attend, flowers are blooming in Little Rock. Greenery is coming back to life. If you’re tired of winter, get your frozen butt down here to enjoy a little of what us northerners won’t see for another month or two.

As for pens, we’ve reloaded with dozens of new pens not yet available online. From vintage third-tier pens to Sheaffer TouchDowns and Snorkels to Parker Vacumatics to preowned luxury Waterman and Yard O Led, we’ve got tons to please pen lovers in the western portion of the American South.

I told you. I haven’t had a chance to catch my breath since the Baltimore Show. And Baltimore put on a fine pen show, indeed. This was my first year in attendance, and I was amazed by the organization, friendliness and crowds. Bert Oser and his crew put on a delightful event that was great for shaking off the winter rust as pen show season springs back to life.

Customers I’ve known for years but have never met in person came to say hi. We met a lot of new-to-us pen lovers. And it was great seeing so many younger, newer-to-collecting pen enthusiasts at the show. It was a blast introducing people to vintage pens, while learning about the tastes of more seasoned veterans in the world of pens.

Thanks to all those who made Baltimore so special, and I can’t wait to see y’all in Little Rock!

How Do I Re-Sac a Vintage Pen

You can’t make an omelette without breaking a few eggs, the old saying goes, and it is true for learning how to fix vintage pens. Today, we are going to learn how to restore a lever-filling fountain pen…or re-sac it, as they say. But first, you are going to have to get used to the concept that you’re going to destroy a few pens along the way—even if you’re careful.

Find a few good, cheap vintage pens to practice restoring before experimenting with more expensive models. This deformed Sheaffer Balance 350 is a great starter pen.

When you are starting out, don’t begin with an unrestored version of your grail pen. Find some broken-down cheap pens such as Wearevers, Esterbrooks or even this banana’d Sheaffer 350 Balance. The longer you are on the hunt, the more you will find vintage pens that turn into the shape of bananas. The deformation happens when the pen is left in the sun or near a heater for too long, which warps the plastic/celluloid.

In addition to a good practice pen, you will need some ink sacs, a pair of spark-plug/section pliers, a long dental pick, sac shellac or rubber cement, scissors that can cut through rubber ink sacs, a jar or cup, clean water, polish, a cloth rag, paper towels, a hairdryer, a razor blade and, if at all possible, an ultra-sonic cleaner. You can get most of these items pretty cheaply. One trick of the professionals is to buy a pair of rubber coated spark-plug pliers, instead of formal “section pliers” that you can find on many pen restoration sites. Why? Spark-plug pliers can be had for less than $10 at most auto parts stores. Section pliers are almost always the same, exact pliers but marked up to $20 or $30. In the early days of pen restoration as a hobby in the 1970s and ’80s, a lot of guys used regular pliers and cut off two one-inch sections of hose to cover the teeth of their normal pliers. That’s how I was first taught.

Attempting to keep this simple, I’m going to break this down into what I hope are very simple steps to make this as fun and easy an experience as possible.

  1. I like small mustard or baby food jars to use for filling with just enough water to get the pen wet from the tip of the nib to just over the threads of the barrel.

    Fill a cup with just enough room-temperature water that you can stick your pen in and go just a little bit over the section and past the cap threads. (Sections are the writing grip into which the nib and feed are inserted in one end.) Let it soak for at least an hour. (Never use hot water.) This leaches out a lot of the dried old ink in the nib and inkfeed, while also potentially softening any glue or shellac used to hold the section tightly into the barrel. Many of the old factory repair manuals encouraged repairmen to use a dab of sac shellac to hold the sometimes loose pressure-fit sections into the barrel. WARNING: Water is necessary, but it also isn’t your friend. Black hard rubbers turn chocolatey brown in water fairly quickly. (An hour might be too long for some rubbers.) Some celluloids get more brittle or discolored when in water too long. Be sure to dry off the pen as soon as you remove it from the water.

2. Use the hairdryer to warm up the space where the section and barrel meet. DO NOT melt the plastic or set the celluloid on fire. All you need is a little warm to the touch. Until you get comfortable, keep the heat to barely noticeable to the touch. Grip the section, and only the section, with your rubber coated pliers. Very gently and slowly begin to twist counter clockwise as you hold the barrel in your other hand. It is common to hear some very scary cracking sounds. Usually, that sound is the petrified rubber ink sac in the pen breaking apart as you open. Sometimes it is the pen barrel breaking. Experience will teach you the difference. If you feel the section coming loose,

Grip only the section with rubber coated pliers, such as these spark-plug pliers. Don’t grip too tightly, just enough not to let go.

keep twisting slowly and gently. If you do not feel it turning or you feel it actively resisting, stop twisting. Some sections—especially Parker Duofolds and Vacumatics—were threaded into the pen barrels, which is why we usually start with a twist. Most pens of all brands were straight pressure-fit sections. HOWEVER, some brands—especially Wahl-Eversharp, although they were extremely inconsistent—used little pins in the barrel or section to hold the section firmly in place. You CANNOT twist those sections without destroying the barrel or section. If a section resists twisting, hit it with a little more heat and very gently start trying to wiggle it in teeny, tiny side-to-side motions while pulling straight out.

This is the most dangerous part of the entire restoration job. This is where probably 80% of all pens break, if they are going to break. ALSO, celluloid is insanely flammable. DO NOT get it hot. If it catches fire, it burns like a magnesium flare. It is an extremely hot burning flame that burns extremely quickly. Early on, I accidentally set a Vacumatic on fire. It scared the hell out of me, and it was a miracle I didn’t burn down my house. Even after getting it under running water it didn’t go out right away. I had to drop it in the steel sink and flood it to put the fire out. In about 10 seconds, it burned away the majority of the barrel. Be careful with the heat.

Use a razor to scrape the old sac pieces off the section nipple.

3. Once the section is free, scoop out the old sac guts from inside the barrel with the dental pick. Sometimes those guts stick pretty good to the inside of the barrel. A flashlight or gun light can help you see in to make sure you got it all. Do not put water in the barrel to clean out the sac or old ink. This will likely ruin and rust-out the pressure-bar assembly.

4. Use the razor to scrape the remnants of the old ink sac from the nipple of the section. Be careful not to cut yourself or split open the nipple.

5. Fill your ultra-sonic cleaner with clean, room-temperature water. Sometimes a drop or two of ammonia will help badly clogged pens. Put enough water in to completely submerge the cap and section assembly. Before you turn it on, let the cap soak for a minute or so. This allows the water to penetrate the inner cap, where a lot of old ink is usually trapped. After the cap and section have had a minute to soak, turn on the ultra-sonic cleaner for no more than 2 minutes.

If feasible, an ultra-sonic cleaner is the easiest way to remove old ink.

You might not see a lot of “action” with your eyes, but the vibrations are practically violent to the parts that are submerged. It can shake free most of the old ink in two minutes or less. If a cap lip is cracked, I’ve seen some caps crumble in the ultra sonic cleaner. That’s how powerful it is.

NEVER stick your fingers in the ultra-sonic cleaner when it is turned on. It can damage your fingers and their joints. Also, don’t leave your parts in for much longer than two minutes because the cleaner will get hot and potentially damage or discolor your parts.

Turn off the ultra-sonic cleaner, collect your parts and drain the old dirty water. Then rinse the parts under the faucet with room temperature water for a few seconds. Shake the parts dry, and then dry them with a paper towel on the outside. Q-tips are perfect for drying and removing the remaining ink from inside the cap.

6. I like to polish the pen next, especially the nib. It allows me to see any major flaws I might need to work on, such as replacing the nib while the section is exposed. I use a pin-head dollop of MAAS metal polish on a Q-tip to get the nib shining like new. I use the clean side of the Q-tip to wipe off the remaining polish. Then I dip the nib in water and dry it with a clean rag to get off the remaining, invisible polish remnants. I repeat the process with a pea-size drop of MAAS metal polish on the rag and polish up the rest of the pen, rubbing it down several times with the clean parts of the rag…avoiding water.

Every repairman I know seems to have a different process for polishing a pen. The method above is adequate for most pens. Yet, if you’re a detail-oriented person, there are myriad methods of multiple polishes or wet sanding that do a much more factory-fresh looking job. Yet, those methods take up to an hour and are worthy of their own article.

This photo illustrates how to eyeball the spot you need to trim the ink sac.

7. Sizing an ink sac. How detail oriented are you? You can easily research what size sacs went into what pens. You can measure the nipple with a fine ruler using increments of 1/64th of an inch, the way old pen repair manuals did to find the right aperture width of the ink sac. Or, you can eyeball it.

The real trick to eyeballing it isn’t fitting the sac to the nipple but finding the right sac to fit inside the barrel. You do not want the edges of the sac to snug against the inside of the barrel. It is best if the sac can easily slide in and out of the barrel, preferably with a little space all around the sac. If one is to carry a pen in their shirt pocket, the goal is not to transfer body heat through the barrel to the sac and ink, which might effect the interior pressure of the ink in the pen and have it leak a bit on you with a full pen.

Regardless of how you choose the sac size, you will likely need to trim the ink sac before installing it. Most ink sacs are longer than the pen barrels. My rule of thumb is quite literally a rule of thumb. I stick the sac in the barrel as far as it will go. I then pinch the end of the barrel at the threads, with my thumb having just enough reach to go past the threads. Pinching awkwardly down on the sac, right where it exits the barrel, I remove the sac. Gaging where my thumb tip is, I trim the sac at the tip of my thumb. Usually, this allows just enough room for the section and nipple inside the pen so that the sac can be as long as it needs to be. You can double check the length by putting the section and sac next to the empty barrel, as they would fit inside it.

Use Talc to powder and preserve your new ink sac before final re-assembly.

8. Most modern pen restorers use orange shellac to affix the sac to the nipple. Before most of us learned how to make or knew where to find orange shellac for sale, rubber cement was the go-to adhesive. Orange shellac is nearly perfect, as it can harden and still be water soluble. Rubber cement forms a good seal at first but can be more easily effected by heat and aging. Yet, it better fills-in tiny hairline cracks in the nipple, hopefully extending the functional life of the pen. (NEVER use super glues of any kind. The rubber ink sacs will give out long before the super glue ever does and you can ruin the pen by forever getting the section stuck in the barrel…or sticking other wrong parts together.)

On this pen, we painted only the nipple with a thin layer of shellac. Then we slipped the sac over it. After that, we dusted the sac with pure talcum powder, which helps to extend the life of the sac.

9. Fitting the section back into the barrel is the second most dangerous part of the restoration process. Sometimes the barrel opening shrinks while the section is out and cracks open if you put the section back in too quickly or roughly. If the section feels like it is having difficulty going back in, maybe warm up the barrel end a little and gently wiggle the section back into place. Although it doesn’t really matter, I like twist the section into place where the top of the nib is even with the lever on the pen.

Congrats! Your pen is fully restored, looking beautiful and ready to write.

If the section is too loose, you can tighten it up with a tiny cut out of a piece of onion-skin paper. Or, like the old repair manuals, you can use a small drop or two of shellac on the section. Just wipe off the excess shellac and keep it out of the threads.

10. Let the shellac dry. As the shellac is water soluble, I wait about 24 hours before I test the pen with water or ink. Once the shellac is dry and the pen tests well, you’re all done. Congrats!

It took longer to read this article than it likely will take you to restore a pen—at least once you get used to the process. Fixing and writing with vintage pens is my favorite part of the hobby. If you like seeing how things work and getting your hands dirty, you’ll love pen repair. The only thing that improves it for me might be repairing pens while listening to a Cubs game on the radio and nursing a cold beer.

Always feel free to write in with questions. And always remember to go slowly and take your time. It isn’t a race. Enjoy the zen of pen repair, and best of luck to your future projects!

2018 DC Pen Show Proves a Success

To be honest, a lot of us had our doubts about the 2018 DC Pen Show. Last year’s show was a near train wreck at the start. So, we waited with baited breath to see if it was a harbinger for a disaster for this year’s show. It was NOT.

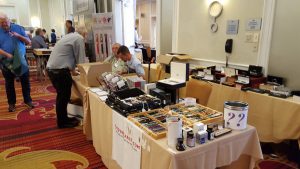
Here’s ThePenMarket.com table in action at the 2018 DC Pen Show. Check out our killer location on the wall by the side doors to the ballroom!

The 2018 DC Pen Show was a fun, well-oiled machine! Well organized and well advertised, this year’s show dazzled. Members of the pen community, old and new, hobnobbed and shared in 4 full days of inky geek love.

But, I’m getting head of myself.

The drive was actually uneventful for a change. No blowouts, thunderstorms or tornados. It was really challenging driving in dry, sunny conditions.

As no show would be complete without a battlefield visit, I returned to Manassas/Bull Run for the first time in more than 30 years. It seemed much bigger when I was a kid. While the first land battle of the Civil War did range over several miles, the park focused on the epicenter of the battle. The gently hilly terrain really played a significant part of the battle…as did inconsistently colored uniforms. I remember marveling up at the big bronze statue of Gen. Stonewall Jackson as a kid. It really commands the view of the battlefield, but as an adult the statue looked comical, as Jackson’s biceps are seemingly 3 times larger than his head. Not even Superman is that out of proportion.

Overlooked is the battle of 2nd Manassas, which took place a little more than a year after the first. Just down the road from the original battle site, the second battle was another victory for Jackson and the South, setting up the battle of Antietam a short while later. A little more isolated that first Manassas, the battlefield seems better preserved and very soothing to visit on a sunny afternoon with all of the cicadas and grasshoppers warming up for the evening, as tall grasses and wildflowers sway in the breeze. Hallowed ground for certain.

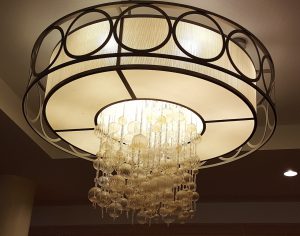
I love these chandeliers hanging in the ballrooms of the hotel at the DC Pen Show. It has a certain jellyfish quality to it.

The pen show was great. My friends and I arrived to be among the first to set up Thursday morning on the free-for-all no table assignments day. As the day sped by, more vendors set up temporary shop and weekend pass holders got first crack at some phenomenal pens. This is the day to be there for vintage pen fans. About 2 hours before tear down, it was like a huge family reunion, as I met with and talked to friends from all over the U.S., Canada, Croatia, Czech Republic and Russia. It is quite possible I left out a few countries, but it is unintentional.

Friday got an early jump. My fellow vendors started arriving around 8:30 in the morning, AND we already had table assignments waiting for us. It was great to set up before the crowds rushed us. But, rush us, they did. I got so busy setting up and helping early customers that I totally forgot to move my car from under the portico to a real parking space! Thank goodness the hotel didn’t have my car towed! My roommates and friends gave me well-deserved hell for it for the rest of the weekend.

Saturday was a blur, but, at one point, I got to host my first repair seminar with pen tool genius Dale Bebe. We had an hour to explain the fundamentals of restoring a lever-filler pen and what tools to achieve our goals.

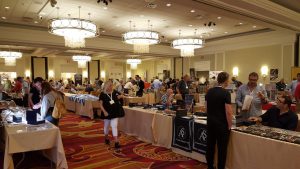
How busy does the DC show get? This is how full it was before it officially opened for the day!

As I did that my friend Neal S. watched my table with stunning success, really helping me while I was away. That night, I made my annual pilgrimage to the Black Pen Society meeting. Yay, scotch and cigars.

Sunday was a busy morning, and then–just like that–it was all over. It was time to say farewell and pack up all my troubles in my old kit bag.

Monday, I finally got to play tourist in our nation’s capitol. I took my first Metro ride downtown to the National Mall. (The Metro is way cleaner than the El in Chicago…smoother riding, too.) My destination was a 30-year bucket-list museum: The Smithsonian Air & Space Museum.

Howard Hughes broke both speed and distance records with this graceful, slick art deco wonder with wings.

FIRST, it looks nothing like “A Night at the Museum” with Ben Stiller and Amy Adams. I was very disappointed about that…and no Amy Adams-portrayed Amelia Earhart flirting with me. Once I got over that, I enjoyed the surprisingly small museum. Impressive were the original Wright Flyer, Glamorous Glennis (the first plane to break the sound barrier), authentic V-1 and V-2 rockets and missiles from WWII and myriad other aircraft. Yet, what really spun my prop was Howard Hughes’ HB-1 plane circa 1935 that broke all of the then-known speed records. A precursor of the Bee-Gee, this plane was as fast and sleek looking as any plane on display! I loved it and a 1930s plane that was the first to fly across all of Antarctica.

To my greater surprise, my favorite exhibit looked at the history of navigation! I actually learned how to use a sextant and a chronometer to find my global position using stars at night! Now I kinda wanna roam around the country with a sextant and calculating my position on earth. The display moved through the years, also discussing how early pilots had to use the sun and a modernized sextant to navigate before radio beams could be used and then, ultimately, satellites.

Another great trip in the books.

2018 DC Pen Show or Bust!

After last year’s chaotic but successful pen show, we are hitting the road for the 2018 DC Pen Super Show!

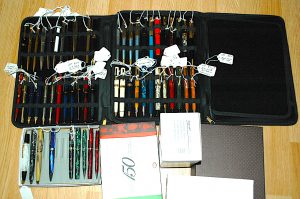
We’ve spent the past month cleaning, polishing and organizing more than 300 vintage and modern pre-owned luxury pens not yet online for this show. This photo shows only a tiny fraction of what we will have available.

This is just a tiny fraction of the more than 300 vintage and pre-owned modern pens not currently on our website that we shall carry on our table at the DC Pen Show this weekend.

Omas, Delta, S.T. Dupont, Namiki, Montegrappa and rare Pelikans will make a splash. Plus, we’ve loaded up on Montblanc from the 1970s and ’80s. In addition to that we’ve been adding a dozen ultra-rare Esterbrook pens, rare vintage Waterman pens and many great vintage Parker and Sheaffer fountain pens.

Naturally, we are returning with our Lamy nib testing station that was a huge hit last year. It will be loaded with this year’s limited edition Safari and Al-Star designs, as well as many great traditional colors. We’ve restocked Lamy ink, too!

We will have something for everyone. With a total of more than 600 pens in every price range on our table, if you can’t find a new treasure to love…you just don’t like pens.