 Shopping Cart


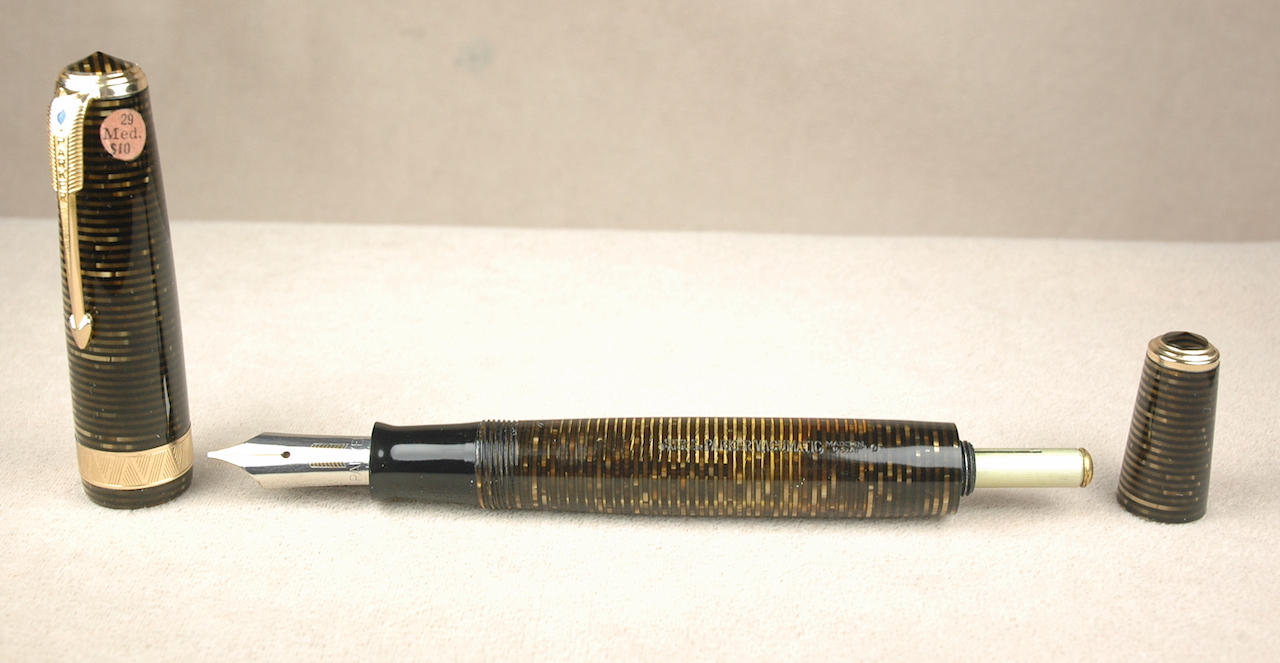
This is a new old stock Parker Vacumatic Maxima in the “Golden Pearl” design. Check out the barrel clarity!
When it comes to vintage Parker pens, Parker Vacumatics are my favorite. I love their stunning art deco designs and over-complicated filling system. The pens have some quirks, too, but, I still love them.
As the Roaring Twenties came to a close, the Parker Pen Company knew it had to build on to its huge success with the Parker Duofold fountain pen or risk losing momentum in a very competitive writing instrument marketplace. Kenneth Parker, son of the company founder George Parker, figured the answer to this problem was a sac-less fountain pen that held more ink than most any other pen on the market. The key to the new pen would be a vacuum pump that used a rubber diaphragm invented in 1928 by Arthur Dahlberg. It was a device that Sheaffer, Waterman, Conklin and Wahl-Eversharp turned down. That device would be the foundation of a pen Parker first released to the public in 1932 as the Golden Arrow. Yet, the company would soon rebrand it the Vacumatic.
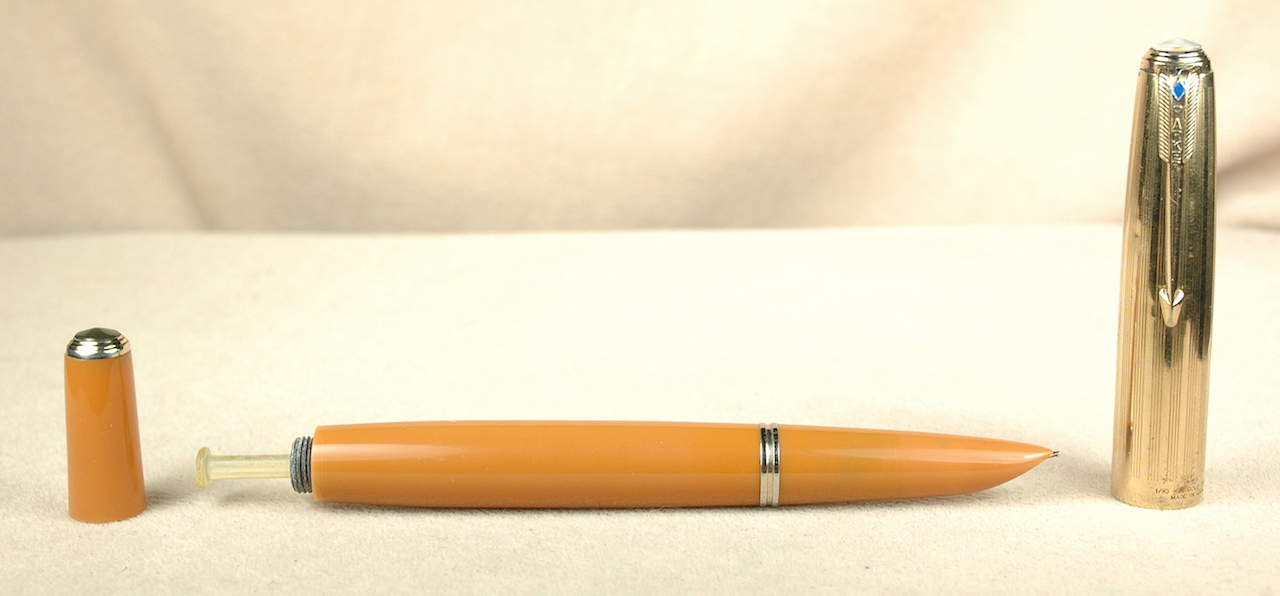
More than a Vacumatic-filling Parker 51, this is the rare, legendary “yellowstone” color in like-new condition.
During the next 16 years, Parker would feature the Vacumatic filling system in 3 of its most famous pens: the Vacumatic, the 2nd generation Duofold and the Parker 51. If you get into vintage pen collecting, odds are really good that you’ll encounter numerous “Vacs” that need repair. Restoring these pens is both easy and complicated. It really just depends on how lucky you get.
Parker Vacumatics and 2nd generation Duofolds with Vacumatic fillers (sometimes called DuoVacs) were made of celluloid. Celluloid is a beautiful plastic but it ages inconsistently. Some Vacs are as strong as they day they were made. Others that were exposed to prolonged heat might be brittle. In my own very non-scientific experience, I find that the “grey pearl” models of Vacumatics are often very fragile. Soaking the celluloid too long in plain water can damage a pen. ANNNND, for the love of all that you hold dear, keep celluloid pens away from open flames. When celluloid catches fire, it burns fast and hot, like a traffic flare. How do I know? One of the original fountain pen repair books said that one should heat a pen up over an open flame to make it easier to open. I did just that, when I was still learning, and holy cats! I had to leave the damned flaming pen at the bottom of a steel sink filled with water before it would finally go out. NEVER USE AN OPEN FLAME. Turns out hair dryers work just fine.
Vacumatic enthusiasts divide these pens into 3 generations. It is vital to know which generation pen you are working on. 1st Generation pens have a lockdown vacuum tail filler and often an integrated section and barrel. As such, you can’t always unscrew the section from the barrel, as you would the 2nd and 3rd generation pens. Plus, when removing the filling unit, you must first unlock the plunger so it is fully extended. Attempting to remove the filling unit with the plunger locked down will destroy the plunger and filling unit. (Authentic replacements are very hard to find.) 2nd Generation pens still have an aluminum plunger but no lockdown device. They usually have a section that unscrews, too. 3rd Generation pens have a plastic plunger and unscrewing sections. These were World War II production models, and aluminum was rationed.
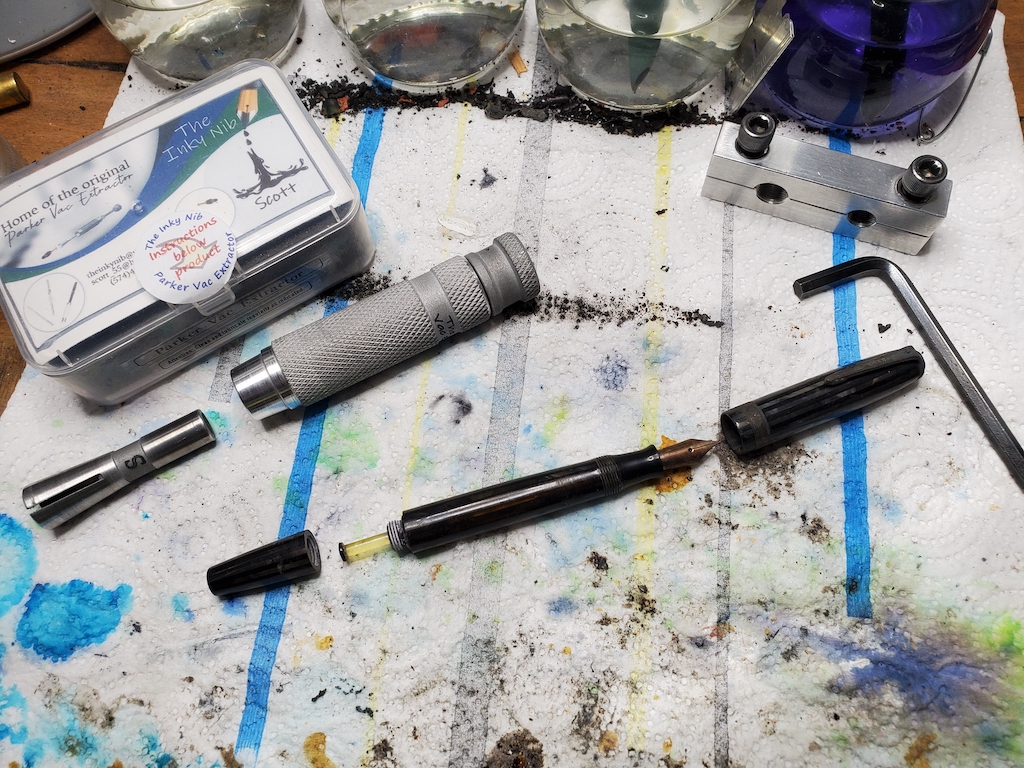
On the left is the Vac Extractor Tool and to the upper right is the “stocks” style Vac unit tool. A Parker “DuoVac” awaits them below.
Unlike most pens which can be restored with the same tools, Parker Vacumatic pens need a special filling unit tool that helps you to remove and return the filling unit into the tail of the pen. I use two different types depending on the challenge of the job. My favorite looks like a medieval stocks with two different size (threaded) holes and is tightened with screws and an Allen Wrench/hex key. The small hole is for debutante and standard/major-sized filling units. The larger hole is for the oversized Maximas. I generally prefer it, as it makes resetting the new unit with a lubed diaphragm a little easier. The other design that I like was invented by Scott Pauley at The Inky Nib. He calls it the Vac Extractor Tool. Unlike the stocks tool that I normally use, this tool has the tightest threaded grip imaginable on the filling unit. My “stocks” just can’t get a tight enough grip on maybe 1 in 20 filling units. That is when I break out the V.E.T. to get the job done. Very clever design, fairly easy to use.
For today’s demonstration of Vac repair, I have chosen a 1945 Parker Duofold with a vacumatic filler. As with the 3rd generation Vacumatics and early Parker 51s, it has the plastic plunger unit. It also has a section that you can unscrew.
As usual, I start by soaking the nib and section with water just deep enough to cover the barrel threads for an hour or so to leach out the old ink and help loosen the section. An hour is usually safe enough not to damage the celluloid with the water emersion.
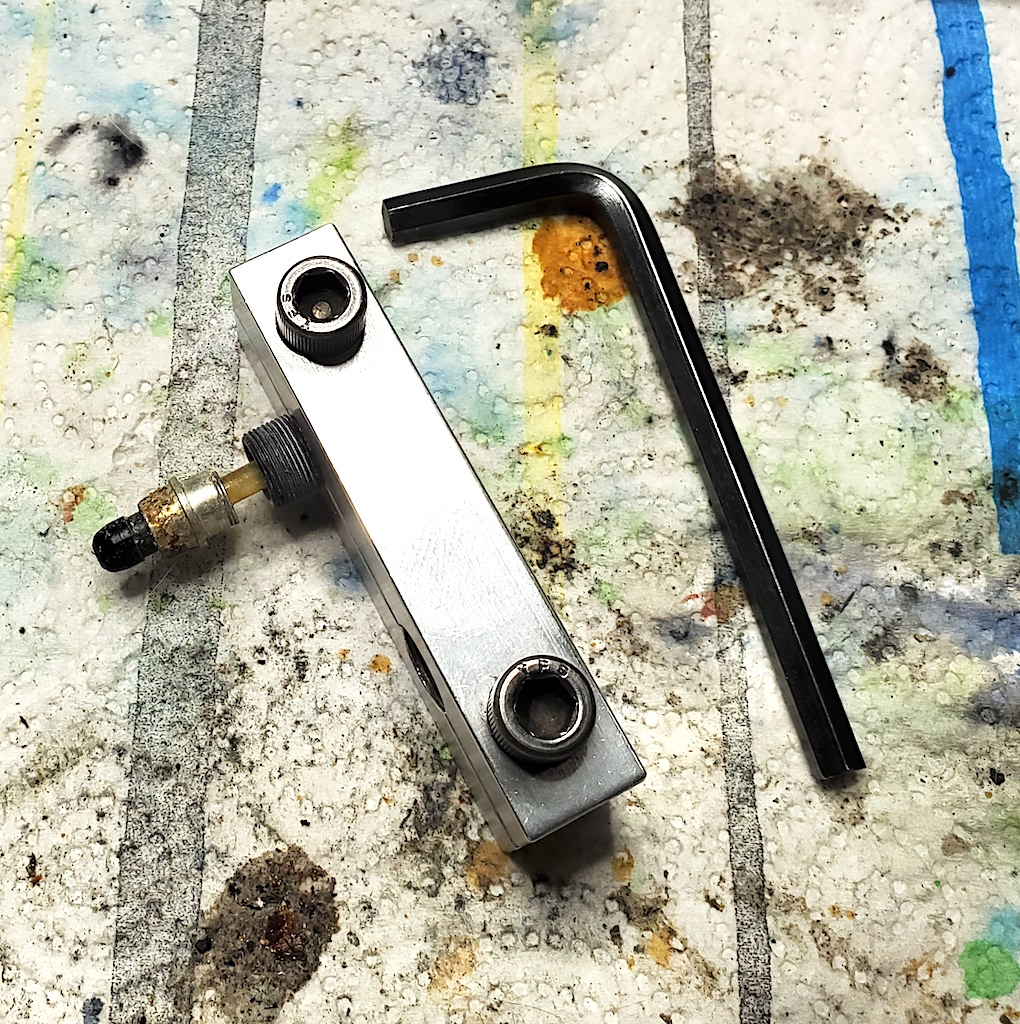
This is a close-up of the extracted filler unit in the stocks.
After drying off the nib and section, I test to see if I can unscrew the section with section pliers and just a few seconds of heat from a hair dryer. If I can get it started, I leave it for later. Then I thread the filling unit into the stocks and tighten up the stocks. Next I take the hair dryer and apply a few seconds of even heat around the celluloid tail of the pen. I grip as much of the barrel of the pen as I can in one hand and then slowly apply pressure turning to the left with the stocks. I am lucky with this pen that the unit unscrews fairly easily. If it fought me, I would apply a little more heat at a time until it finally gave way.
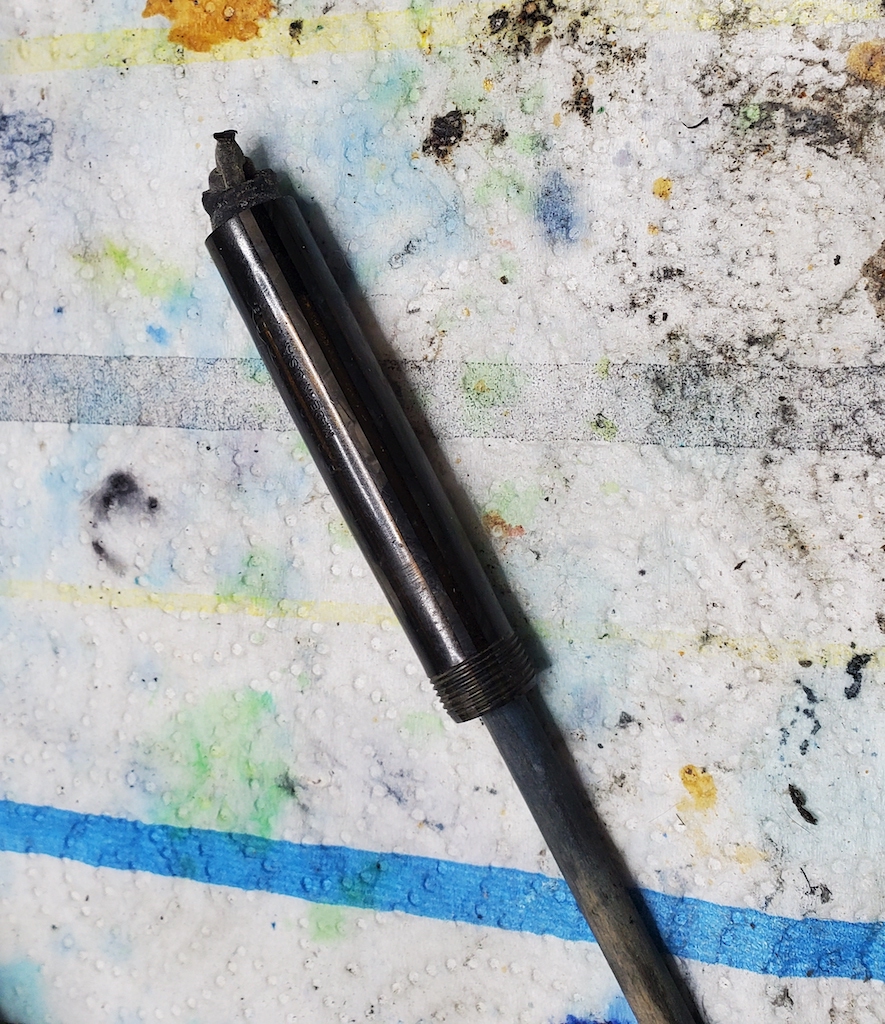
Watch how the wooden dowel pushes up through the section side of the barrel to remove the old diaphragm from the barrel.
After the tail-end is open, I then unscrew the section with the nib and feed all still in place. The reason that I don’t unscrew the section, even though I’ve loosened it, is that I want the added strength and stability of the celluloid at that end of the barrel while pressure is being applied to the tail end. The tail end experiences more torque and a little more fragile than the section end. I don’t want to accidentally squeeze the barrel too hard so that I crack the open end.
Sometimes the threaded black-plastic portion of the filler unit comes out, but the plunger portion remains stuck inside the tail. Sometimes the remains of the decaying rubber diaphragm remain stuck in the tail of the barrel. In these situations, I use a wooden dowel to remove them. After the big parts are out, then you need to use a dental pick or some other device to make sure all of the old diaphragm is out. You want to be especially careful with the barrel’s inner threads.
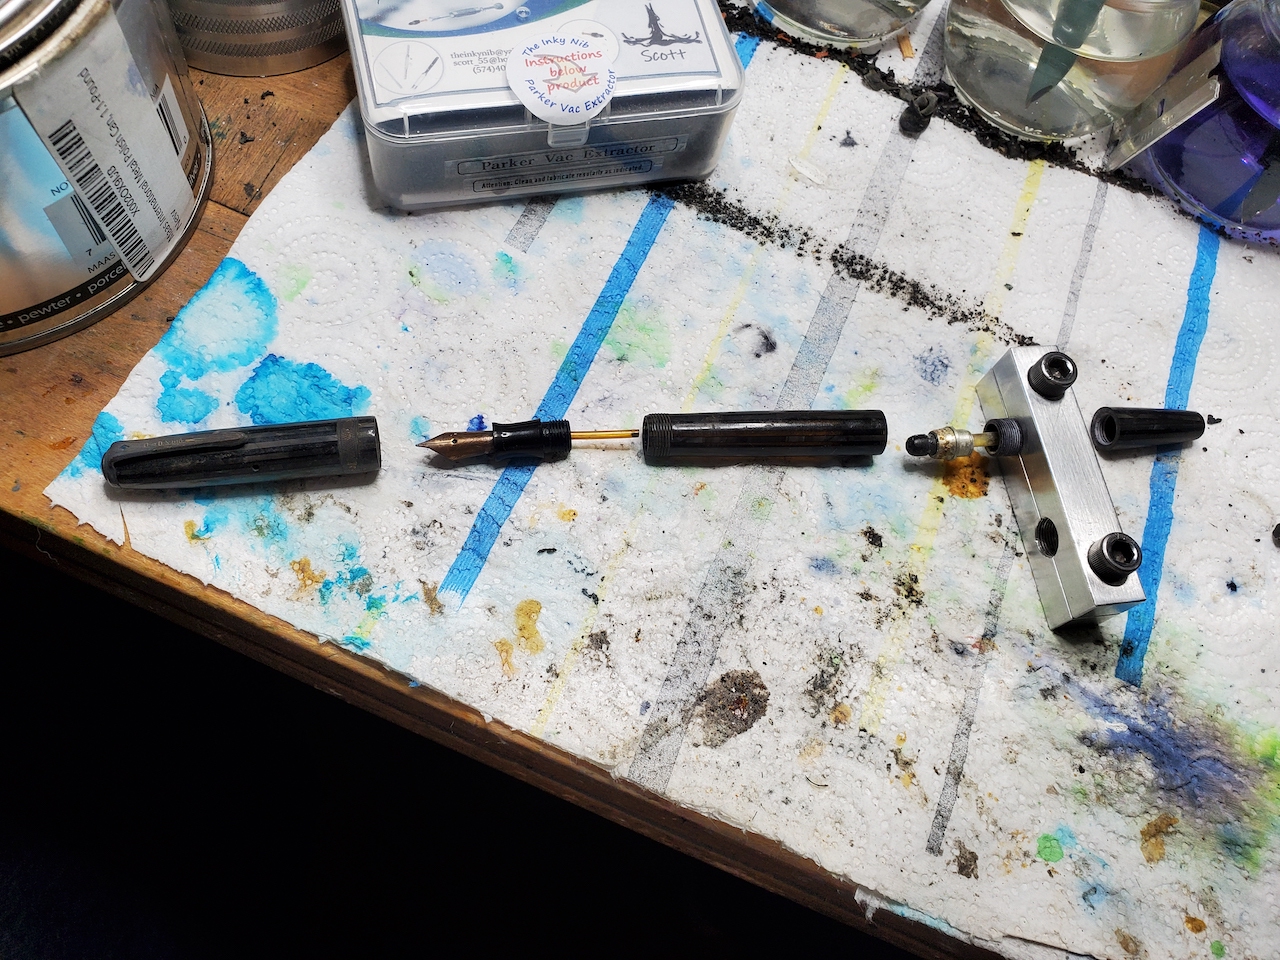
Here is the “field stripped” view of the pen. Note that I do not disassemble the section, nib, feed and breather tube. They are all perfectly happy in place 90+% of the time.
Once the pen is disassembled, the real cleaning begins. There is a trend lately among new vintage pen collectors/repairers online to prove their street cred by also knocking out the nib and feed from the section. This is entirely unnecessary the overwhelming majority of the time and risks breaking things that are perfectly fine as they are. At this point, I just dunk the still fully assembled section in the sonic cleaner along with the cap and barrel. It usually takes fewer than 5 minutes of cavitation to get them clear of old ink and debris. When you are done, dry it all off. I like to buff up the 14k gold nib…if I am not at risk of removing any two-tone plating…apply a little “Super Lube Silicone O-Ring Lubricant” to the section threads and screw it tightly on to the barrel again.
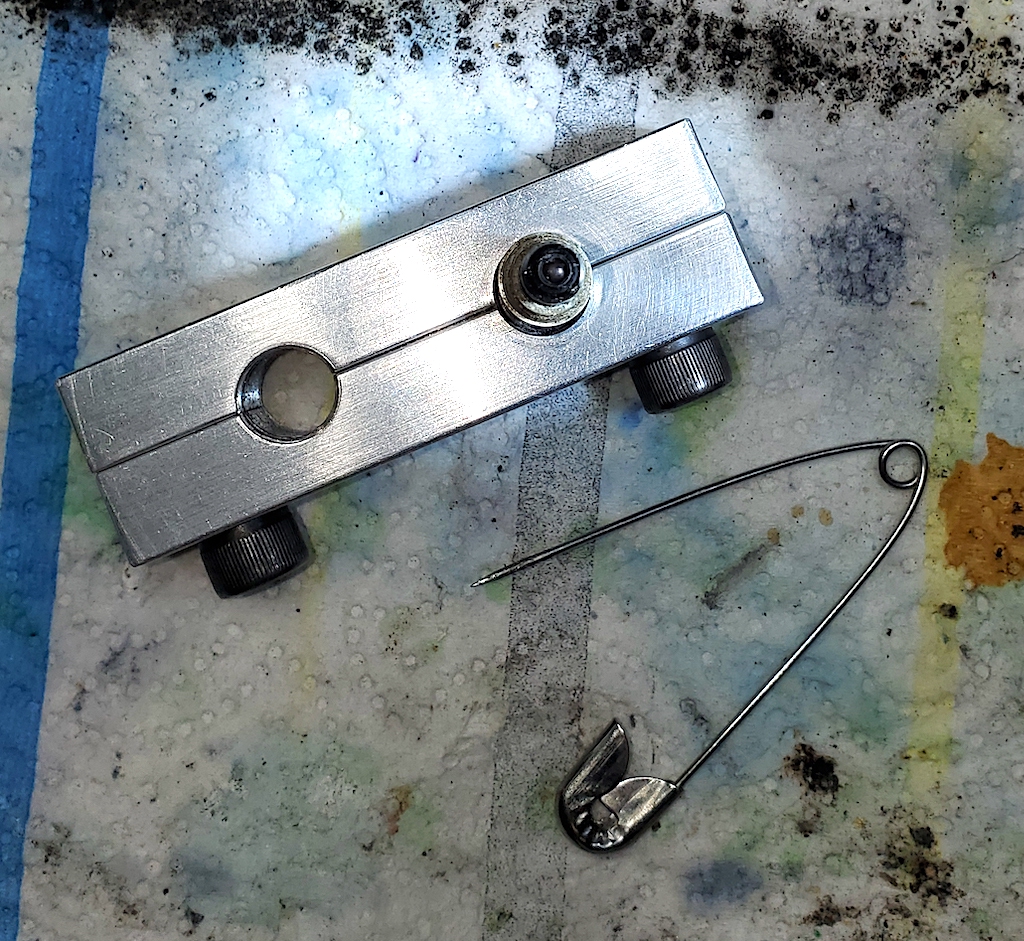
Can you see the little pellet ball in the top of the plunger from this view?
At no point did Parker actually use any glue on these pens. However, over the years, various repairmen did use glues and shellacs. That brown crud on the bottom of the plunger three photos up from here is old shellac. I scrape it off with a razor. (Please note that I leave the filling unit in the stocks for the duration of the restoration process. This helps me to make sure the proper depth is achieved when I screw the unit back into place so that the tail cap and barrel will realign properly.) Then I try to carefully remove the pellet from inside the plastic plunger’s cup. It was really difficult to get a good photo of that annoying little ball. The goal is to minimize damage to the cup of the plunger. I recently discovered there is a man in the UK who make a dremel-friendly drill system to drill out the pellets, but I have not yet tried it. Typically, I use a pin to try scooping out the pellet. It deforms the cup a little, but I try to pinch the cup back into shape when I am done.
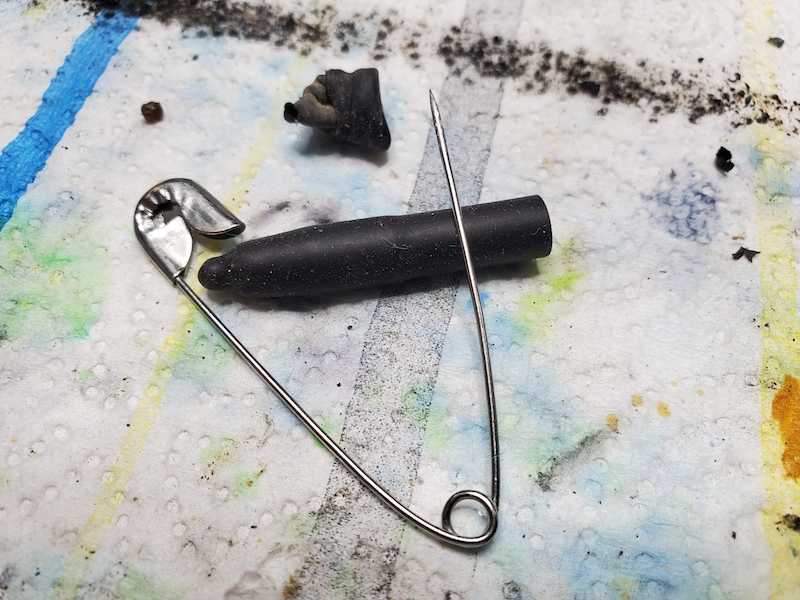 Trim the diaphragm at roughly the point you see where I’ve lain a pin over it in the photo. New diaphragms are usually way too long to work properly. It is vital that the diaphragm can be stretched with the plunger to the point where it almost touches the breather tube inside the barrel. However, if it is so long that it impedes the function of the breather tube, the pen won’t fill or empty properly.
Inside the diaphragm is a new pellet. To start reassembling the filler, you will need to carefully get that rubber dip end of the diaphragm with the ball/pellet in it into the cup of the plunger. Once the diaphragm is secure in the cup of the plunger, you are going to hold the diaphragm in place and push the plunger up through the center of the diaphragm and invert the diaphragm from its original starting position. Once you have the original open lip of the diaphragm rolled down over the plunger, pinch it with your fingers to that metal cone part that I used a razor to scrape the shellac off of. Also make sure the same cone is held into the black-plastic threaded part of the filler unit so that the plunger is fully extended by itself without the rest of the parts joining it. This is tricky and likely doesn’t make any sense until you actually do it for yourself. While the unit is is pinched and the plunger and diaphragm stretched fully, dab some of that silicone lubricant all over the diaphragm. Finally insert the lubed up mess into the tail of the barrel. Make sure to twist the barrel back and forth so the stretched diaphragm doesn’t get stuck on the sides. Don’t release the pinched cone until it is as deep into the tail as your fingers can let it be. It should snap onto its seat when you release it. Finally, you can screw the black-plastic threads back into the barrel. If all goes well, the unit it will feel tight right where you started at. However, even when things go well, sometimes they don’t stop where you started. NEVER overtighten the filling unit. 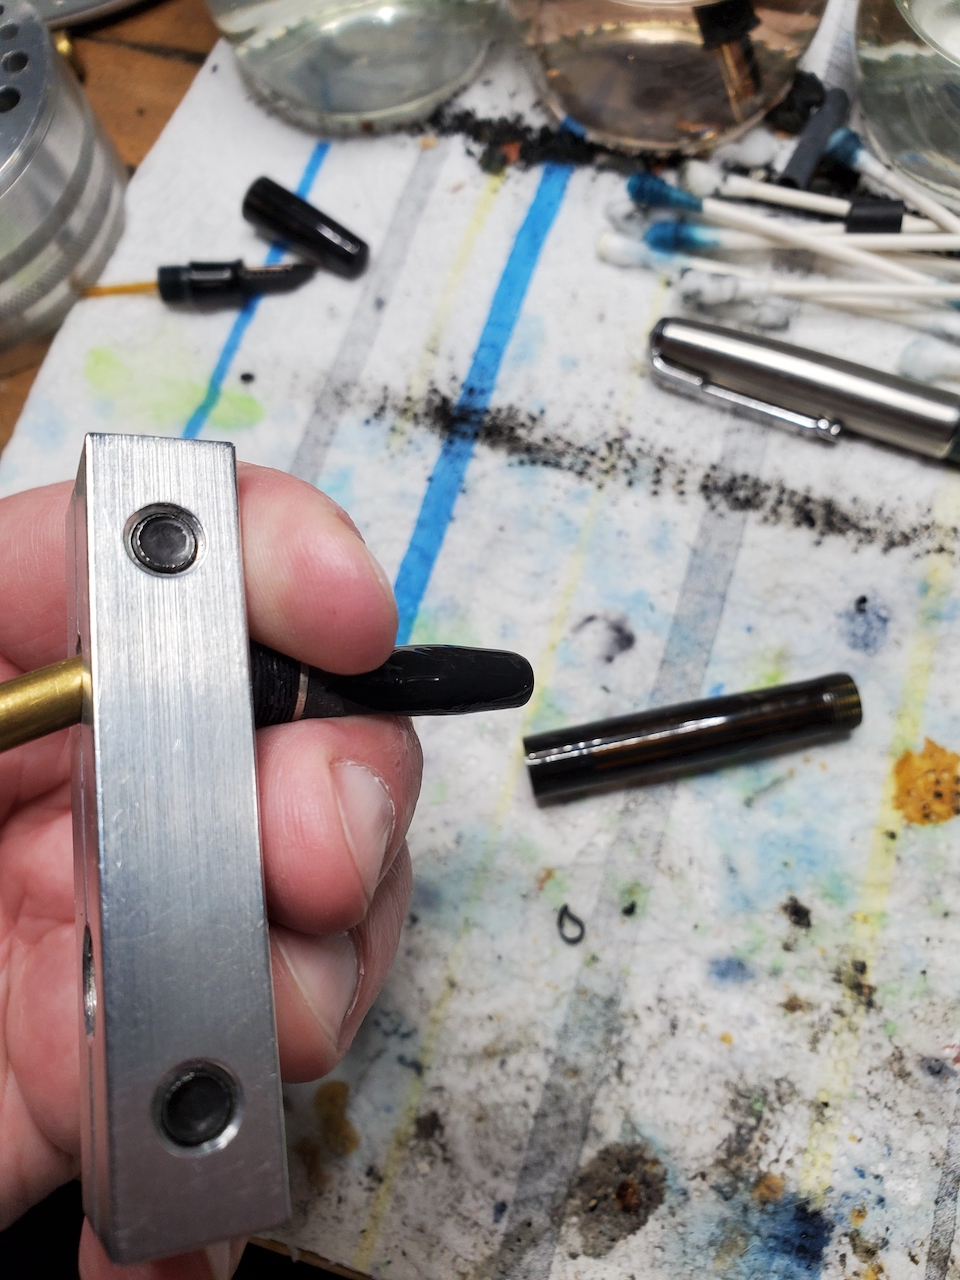 If it starts to snug up early, that’s okay. Sometimes, you might have to unscrew the stocks and reset them a little higher to finish tightening a little deeper than before. It is far more important to get the right snugging of the unit, as the unit holds the diaphragm lip in place while the plunger creates a vacuum with the rest of the rubber. If you overtighten, you can blow out the entire barrel and make it inoperable, ruining the pen. If you don’t get a tight enough closure, the diaphragm will get loose and not work. Don’t worry if the blind cap doesn’t align as perfectly with the barrel as it might have done.
At this point, it is safe to try test filling it with water. Remember it takes 10 to 12 pumps to fill it all the way. If everything looks like it is working okay, the only thing left to do is to polish it to a beautiful luster. Personally, I think wet sanding works best on Parker Vacumatics, 2nd Generation Duofolds and 51s. Tune in this November for our wet sanding tutorial.
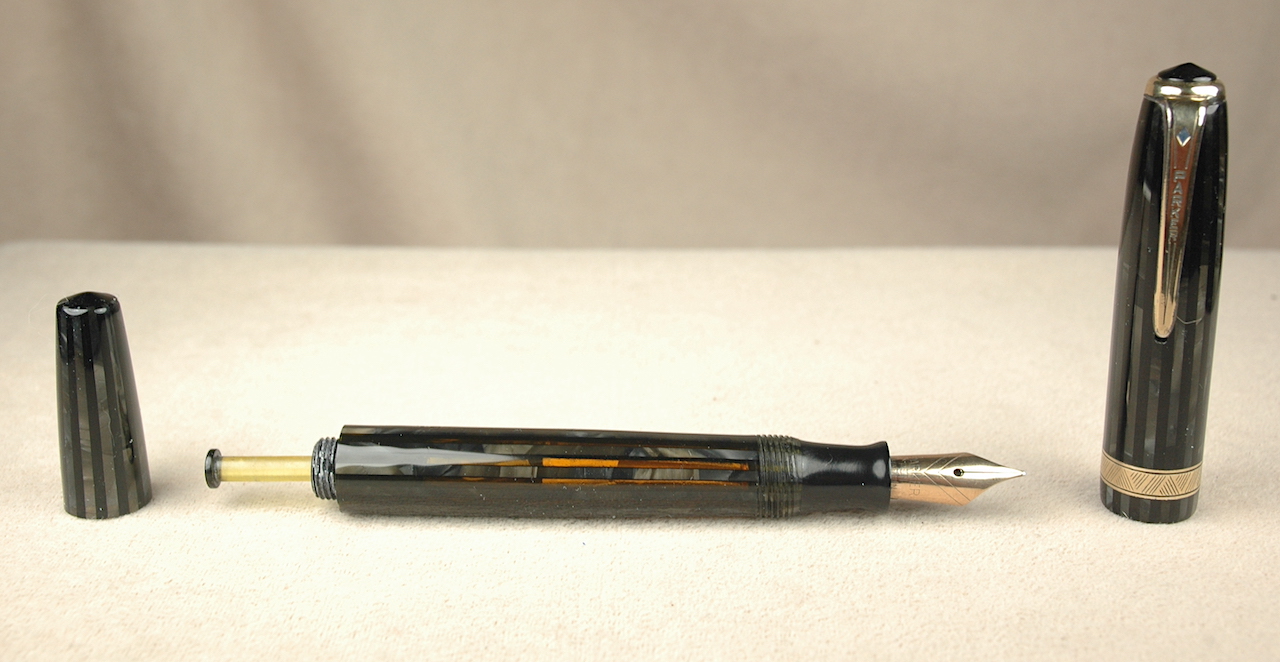
Here is our fully restored Parker Duofold from 1945. That wet sanding really makes it stand out