Tag Archives: vintage pen

How Do I Polish a Pen? Celluloid Edition

EDITOR’S NOTE: Polishing a vintage pen can be a surprisingly dangerous exercise in vintage pen restoration. If you use the wrong method on the wrong material, you will ruin your pen. If you overdo it with the correct method and correct material, you will ruin your pen. We will not be held liable for any problems that arise from your efforts to polish your pens. This is simply an explanation of what we do and have found success with with on our own pens. We do our best to warn about some of the pitfalls but we cannot guarantee we have explained all of them. Results may vary.
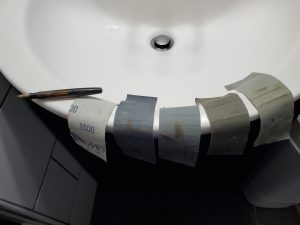
First gather your pen and Micro-mesh sanding cloths at your water source under bright light. You can see both the grit and cloth sides of these strips of various grits spanning 1500, 3600, 6000, 8000 and 12000.

This article explores wet sanding structurally sound celluloid pens by hand to a high-gloss shine. Never wet sand a pen made of hard rubber, especially if it has any sort of chasing design or imprint. Never wet sand a metal pen, either. Never try to wet sand a celluloid pen that is krazing or otherwise deteriorating, as you will destroy whatever is left of it. In this piece I take two heavily damaged Parker pens and restore their luster. However, before I got started on either of them, I examined them carefully to make sure they were free of that shattering plastic look called krazing and cracks in the barrel. A hairline crack in the lip of a cap is okay to wet sand, as long as you are very careful with it as you progress.

WHAT IS WET SANDING? Wet sanding is using different grits of specialty sand “paper” made out of cloth to first rough up and then smooth out the celluloid of a pen with some help from water.

I like using strips of a product called “Micro-mesh” cut into 2-inch by 6-inch sections. I use them in the grit levels of 1500, 3600, 6000, 8000 and 12000. Even if you only have one strip of each of those grits, it can last you dozens of pens.

WATER: You can use it two different ways. One with a thin stream of luke-warm water from a tap or the other way is in a large mixing bowl full of luke-warm water. The latter saves some water, and you can see just how crazy dirty plastic particles can get. Your hands are going to be in water for more than an hour, so you might want to wear some latex or rubber gloves.
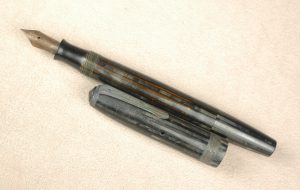
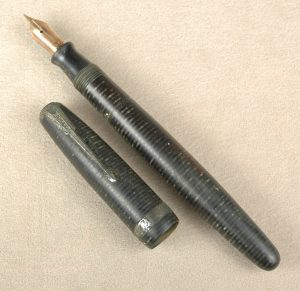
This is a Parker Duofold with a Vacumatic filler. It actually survived Hurricane Katrina nearly 20 years ago. It looks very tarnished and filthy and worn and awful.

HOW IT WORKS: The process to wet sand a pen to near perfection is simple but very repetitive and time consuming. You will want a well-lit area near your water source. There is much better lighting by my bathroom sink, so I make sure to have my 5 strips of Micro-mesh at the sink along with the pen I want to work on. I set a steady but thin stream of water at a temperature I find comfortable from the tap. Next I wet my strip of 1500-grit Micro-mesh. It doesn’t matter if you start with the cap or the barrel, but I like to start with the barrel because it takes longer.

With the Parker Vacumatic pens I have chosen, I take off the main cap but leave the blind cap tightly secured to the barrel. I also have already replaced the diaphragm. This way, if there is a little blind-cap misalignment after the repair, I might be able to smooth it out a bit.

As a right-handed person, I hold the section of the barrel in my left hand. I take the first strip of 1500-grit mesh in my left hand and wet it under the running water. To help keep track of where I am at, I start with the open nib of the Parker Vacumatic facing up. I extend the barrel under the running water and I make 10 complete cycles of rubbing with the mesh strip against the barrel from the section threads to the tip of the blind cap and back to the threads. The 1500-grit mesh is going to scrape off an entire layer of the celluloid, removing the minor scratches and imperfections. Be careful, as it might also remove the last of a shallow barrel imprint! What luster your barrel might have once retained will look horrifyingly dull and scratched. Now I rotate the pen about an 8th or a 10th of a turn and do 10 more cycles of rubbing under the water. You will want to check that the mesh overlaps the original first cycle’s path to make sure you didn’t miss a spot. Take your time and be thorough. Keep the barrel under the running water or in the bowl no matter what grit of mesh you are using. Let the sanding mesh pass through the water. This helps remove the scraped away plastic…and it keeps the sanding from doing more harm than good. Dry sanding can wreck the finish. Keep rotating and doing 10 cycles until the barrel has been uniformly sanded by the 1500-grit mesh.

After the first round of wet sanding is finished, I like to dry off the barrel to inspect the progress and make sure I didn’t miss anything.
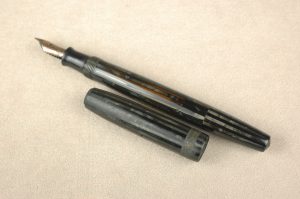
The hurricane survivor is halfway done. Notice the barrel is refreshingly shiny and clean compared to the untouched cap. Please notice the cap’s clip has been removed in preparation to wet sand the rest of the cap.

If everything looks evenly done, I take up my next strip of the mesh (3600 grit) and repeat everything I did the first time with the first strip. HOWEVER, now I do 20 cycles of sanding for each turn of the barrel. The reason is simple: That 1500-grit mesh really wrecked the celluloid and dug some deep sanding grooves into the barrel. 3600-grit mesh is half the strength of the harsher mesh and it take more effort to uniformly start cleaning up the damage from the first time through the process. Once you have uniformly polished the barrel with the 3600-grit mesh, dry it off and examine it.

Don’t be scared that the barrel still looks awful. Under that bright lights look for imperfections within the imperfections. The scuffed barrel will look even worse in a spot you missed. Imagine you just hired a local teen to mow your lawn. Before you pay this person, you check to see that they didn’t miss a spot or leave a thin strip of the grass that is much taller than the rest of the yard. Unlike a lawn that is easy to cut back down to size, a poorly wet sanded spot in the celluloid will only start to look worse, as the finer grits can’t fix what the harsher grits missed. As such, if you jump straight to the 6000-grit mesh, you might accidentally engrain a piece of the 1500-grit polishing portion that only the 3600-grit process can get out. If you find a spot you missed, just put that spot back under the water and give it another 10 cycles of 3600-grit sanding to see if that evens out the spot. Dry it off and check. Keep going until the spot looks uniform to the rest of the pen. You’ll mess up because you are new to it. It takes time and experience to catch the nuance of the sanding levels and how they look. If you get too ahead of yourself, just remember to go back to the stage you think you missed it at. It takes longer but you can correct the mistake.

If the 3600-grit polishing run on the barrel looks uniform and complete. Do it all over again with the 6000-grit mesh. ONLY THIS TIME, do 30 complete sanding cycles for each turn of the barrel. Again dry it off and inspect it for uniformity when you are done. Now it should look like you are making good progress. The finish will start turning from cloudy to glossy…like a fog is starting to lift.

When you are satisfied the 6000-grit work is uniform and complete, move on to the 8000-grit. Now make it 40 complete sanding cycles per turn of the barrel. If you are an impatient person, you might be tempted to call it “Mission Accomplished” when the 8000-grit efforts are dry and uniform. BUT, trust me, there is still a slight layer of haze in the finish of the celluloid.

The 12000-grit mesh is so smooth to the touch, even when dry, you might swear it isn’t gritty at all. However, once you’ve now made 50 complete cycles of wet sanding per turn of the barrel, you will be astounded once you have dried the barrel and made sure the work you did was uniform.
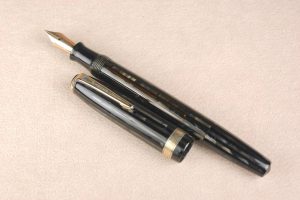
Here is the completed Parker Duofold. Notice the little blemish to the left of the clip. It was way too deep for the wet sanding to polish out of the cap.

Unless there are deep divots or scratches in the barrel, your barrel will now look like new. To help seal that finish and keep the pen shiny, I take just a tiny drop of mineral oil on a cotton rag and rub down the barrel. I then buff it with a dry cloth to remove any excess mineral oil.

With the barrel done, you can repeat this process all over again with the cap. Parker Vacumatics and “Duovacs” (slang for 2nd generation Parker Duofolds with vacumatic filling systems) are fortunate to have removable pocket clips. It is easier to wet sand a cap without its pocket clip. BUT, if you can’t remove the clip, that is okay. Just take your time and polish under the clip. Some people like to mask off the cap ring(s)  while wet sanding the cap. You can brass/remove the plating on the cap bands if you wet sand them. However, if your pen is so ugly that you have to wet sand it, it likely was never going in a museum collection to begin with. Personally, I find it is just easier to wet sand the bands and take the risk. Sometimes they come out looking like new or sometimes I strip the plating. In either case, they are shiny.

PRO-TIPS & TRICKS: Start with a pen that you can ruin and not worry about. As with any new experience, it takes time to perfect the technique and find the ways to grip your pen parts and mesh to maximize comfort and effectiveness.

Wet sanding a complete pen takes me anywhere from 45 minutes to an hour and a half. I save it for pens that are desperate for the tender loving care.

One of the things I mess up the most are the ends of the cap and barrel. It is soothing and easy to wet sand the middle of a cap or barrel. It is easy to forget to get all the way to the barrel threads or end of the barrel…or each extreme end of the cap. Sometimes before drying off and checking to see how I’ve done, I just go back and work around the ends a second time to make sure I got them right.

Vacumatics were made for this type of polishing. Other pens with more exposed metal parts require more effort to keep them safe. For example: A Sheaffer Balance Lifetime is a great candidate for celluloid wet sanding. You just need to take extra steps to protect it. By keeping this lever filler in water, the inner J-bar for the filling system will get very wet. There is no way to get around that. Sooo, when you finish your polishing of this barrel, shake out the water, dry it as thoroughly as you can with Q-tips and then set it so that a little fan can blow room-temperature air into it overnight. If you completely dry it out as quickly as you can, it won’t rust and cause other problems. Only after it is completely dry should you finish the restoration by resaccing it.

Hopefully, this will help you make some of your favorite vintage and modern pens look like new. Please feel free to ask questions. This system works well for me. I know other people who have their own ways of polishing their pens that are different from mine. There is always more than one way to accomplish a task. Best of luck.

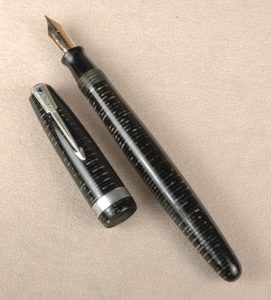
Here is a hurricane damaged Parker Vacumatic with nickel trim. It might look hopeless, but….

Wet sanding has renewed to finish of that poor hurricane ravaged Parker Vacumatic to make it look as close to new as possible.

How Do I Restore A Parker Vacumatic

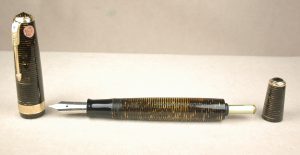
This is a new old stock Parker Vacumatic Maxima in the “Golden Pearl” design. Check out the barrel clarity!

When it comes to vintage Parker pens, Parker Vacumatics are my favorite. I love their stunning art deco designs and over-complicated filling system. The pens have some quirks, too, but, I still love them.
As the Roaring Twenties came to a close, the Parker Pen Company knew it had to build on to its huge success with the Parker Duofold fountain pen or risk losing momentum in a very competitive writing instrument marketplace. Kenneth Parker, son of the company founder George Parker, figured the answer to this problem was a sac-less fountain pen that held more ink than most any other pen on the market. The key to the new pen would be a vacuum pump that used a rubber diaphragm invented in 1928 by Arthur Dahlberg. It was a device that Sheaffer, Waterman, Conklin and Wahl-Eversharp turned down. That device would be the foundation of a pen Parker first released to the public in 1932 as the Golden Arrow. Yet, the company would soon rebrand it the Vacumatic.

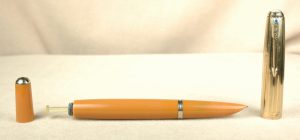
More than a Vacumatic-filling Parker 51, this is the rare, legendary “yellowstone” color in like-new condition.

During the next 16 years, Parker would feature the Vacumatic filling system in 3 of its most famous pens: the Vacumatic, the 2nd generation Duofold and the Parker 51. If you get into vintage pen collecting, odds are really good that you’ll encounter numerous “Vacs” that need repair. Restoring these pens is both easy and complicated. It really just depends on how lucky you get.

Parker Vacumatics and 2nd generation Duofolds with Vacumatic fillers (sometimes called DuoVacs) were made of celluloid. Celluloid is a beautiful plastic but it ages inconsistently. Some Vacs are as strong as they day they were made. Others that were exposed to prolonged heat might be brittle. In my own very non-scientific experience, I find that the “grey pearl” models of Vacumatics are often very fragile. Soaking the celluloid too long in plain water can damage a pen. ANNNND, for the love of all that you hold dear, keep celluloid pens away from open flames. When celluloid catches fire, it burns fast and hot, like a traffic flare. How do I know? One of the original fountain pen repair books said that one should heat a pen up over an open flame to make it easier to open. I did just that, when I was still learning, and holy cats! I had to leave the damned flaming pen at the bottom of a steel sink filled with water before it would finally go out. NEVER USE AN OPEN FLAME. Turns out hair dryers work just fine.

Vacumatic enthusiasts divide these pens into 3 generations. It is vital to know which generation pen you are working on. 1st Generation pens have a lockdown vacuum tail filler and often an integrated section and barrel. As such, you can’t always unscrew the section from the barrel, as you would the 2nd and 3rd generation pens. Plus, when removing the filling unit, you must first unlock the plunger so it is fully extended. Attempting to remove the filling unit with the plunger locked down will destroy the plunger and filling unit. (Authentic replacements are very hard to find.) 2nd Generation pens still have an aluminum plunger but no lockdown device. They usually have a section that unscrews, too. 3rd Generation pens have a plastic plunger and unscrewing sections. These were World War II production models, and aluminum was rationed.

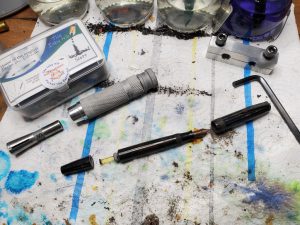
On the left is the Vac Extractor Tool and to the upper right is the “stocks” style Vac unit tool. A Parker “DuoVac” awaits them below.

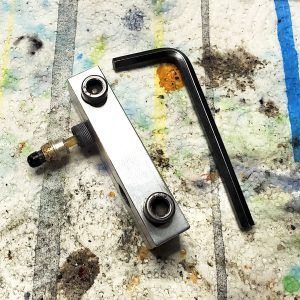
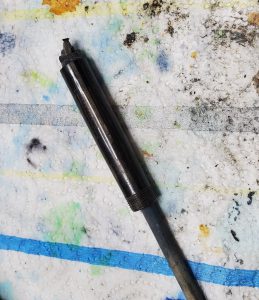
Unlike most pens which can be restored with the same tools, Parker Vacumatic pens need a special filling unit tool that helps you to remove and return the filling unit into the tail of the pen. I use two different types depending on the challenge of the job. My favorite looks like a medieval stocks with two different size (threaded) holes and is tightened with screws and an Allen Wrench/hex key. The small hole is for debutante and standard/major-sized filling units. The larger hole is for the oversized Maximas. I generally prefer it, as it makes resetting the new unit with a lubed diaphragm a little easier. The other design that I like was invented by Scott Pauley at The Inky Nib. He calls it the Vac Extractor Tool. Unlike the stocks tool that I normally use, this tool has the tightest threaded grip imaginable on the filling unit. My “stocks” just can’t get a tight enough grip on maybe 1 in 20 filling units. That is when I break out the V.E.T. to get the job done. Very clever design, fairly easy to use.

For today’s demonstration of Vac repair, I have chosen a 1945 Parker Duofold with a vacumatic filler. As with the 3rd generation Vacumatics and early Parker 51s, it has the plastic plunger unit. It also has a section that you can unscrew.

As usual, I start by soaking the nib and section with water just deep enough to cover the barrel threads for an hour or so to leach out the old ink and help loosen the section. An hour is usually safe enough not to damage the celluloid with the water emersion.
This is a close-up of the extracted filler unit in the stocks.

After drying off the nib and section, I test to see if I can unscrew the section with section pliers and just a few seconds of heat from a hair dryer. If I can get it started, I leave it for later. Then I thread the filling unit into the stocks and tighten up the stocks. Next I take the hair dryer and apply a few seconds of even heat around the celluloid tail of the pen. I grip as much of the barrel of the pen as I can in one hand and then slowly apply pressure turning to the left with the stocks. I am lucky with this pen that the unit unscrews fairly easily. If it fought me, I would apply a little more heat at a time until it finally gave way.


Watch how the wooden dowel pushes up through the section side of the barrel to remove the old diaphragm from the barrel.

After the tail-end is open, I then unscrew the section with the nib and feed all still in place. The reason that I don’t unscrew the section, even though I’ve loosened it, is that I want the added strength and stability of the celluloid at that end of the barrel while pressure is being applied to the tail end. The tail end experiences more torque and a little more fragile than the section end. I don’t want to accidentally squeeze the barrel too hard so that I crack the open end.

Sometimes the threaded black-plastic portion of the filler unit comes out, but the plunger portion remains stuck inside the tail. Sometimes the remains of the decaying rubber diaphragm remain stuck in the tail of the barrel. In these situations, I use a wooden dowel to remove them. After the big parts are out, then you need to use a dental pick or some other device to make sure all of the old diaphragm is out. You want to be especially careful with the barrel’s inner threads.

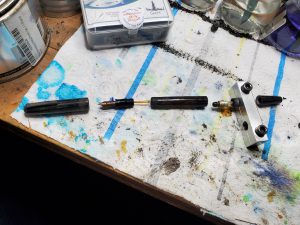
Here is the “field stripped” view of the pen. Note that I do not disassemble the section, nib, feed and breather tube. They are all perfectly happy in place 90+% of the time.

Once the pen is disassembled, the real cleaning begins. There is a trend lately among new vintage pen collectors/repairers online to prove their street cred by also knocking out the nib and feed from the section. This is entirely unnecessary the overwhelming majority of the time and risks breaking things that are perfectly fine as they are. At this point, I just dunk the still fully assembled section in the sonic cleaner along with the cap and barrel. It usually takes fewer than 5 minutes of cavitation to get them clear of old ink and debris. When you are done, dry it all off. I like to buff up the 14k gold nib…if I am not at risk of removing any two-tone plating…apply a little “Super Lube Silicone O-Ring Lubricant” to the section threads and screw it tightly on to the barrel again.

Can you see the little pellet ball in the top of the plunger from this view?

At no point did Parker actually use any glue on these pens. However, over the years, various repairmen did use glues and shellacs. That brown crud on the bottom of the plunger three photos up from here is old shellac. I scrape it off with a razor. (Please note that I leave the filling unit in the stocks for the duration of the restoration process. This helps me to make sure the proper depth is achieved when I screw the unit back into place so that the tail cap and barrel will realign properly.) Then I try to carefully remove the pellet from inside the plastic plunger’s cup. It was really difficult to get a good photo of that annoying little ball. The goal is to minimize damage to the cup of the plunger. I recently discovered there is a man in the UK who make a dremel-friendly drill system to drill out the pellets, but I have not yet tried it. Typically, I use a pin to try scooping out the pellet. It deforms the cup a little, but I try to pinch the cup back into shape when I am done.

Trim the diaphragm at roughly the point you see where I’ve lain a pin over it in the photo. New diaphragms are usually way too long to work properly. It is vital that the diaphragm can be stretched with the plunger to the point where it almost touches the breather tube inside the barrel. However, if it is so long that it impedes the function of the breather tube, the pen won’t fill or empty properly.

Inside the diaphragm is a new pellet. To start reassembling the filler, you will need to carefully get that rubber dip end of the diaphragm with the ball/pellet in it into the cup of the plunger. Once the diaphragm is secure in the cup of the plunger, you are going to hold the diaphragm in place and push the plunger up through the center of the diaphragm and invert the diaphragm from its original starting position. Once you have the original open lip of the diaphragm rolled down over the plunger, pinch it with your fingers to that metal cone part that I used a razor to scrape the shellac off of. Also make sure the same cone is held into the black-plastic threaded part of the filler unit so that the plunger is fully extended by itself without the rest of the parts joining it. This is tricky and likely doesn’t make any sense until you actually do it for yourself. While the unit is is pinched and the plunger and diaphragm stretched fully, dab some of that silicone lubricant all over the diaphragm. Finally insert the lubed up mess into the tail of the barrel. Make sure to twist the barrel back and forth so the stretched diaphragm doesn’t get stuck on the sides. Don’t release the pinched cone until it is as deep into the tail as your fingers can let it be. It should snap onto its seat when you release it. Finally, you can screw the black-plastic threads back into the barrel. If all goes well, the unit it will feel tight right where you started at. However, even when things go well, sometimes they don’t stop where you started. NEVER overtighten the filling unit. If it starts to snug up early, that’s okay. Sometimes, you might have to unscrew the stocks and reset them a little higher to finish tightening a little deeper than before. It is far more important to get the right snugging of the unit, as the unit holds the diaphragm lip in place while the plunger creates a vacuum with the rest of the rubber. If you overtighten, you can blow out the entire barrel and make it inoperable, ruining the pen. If you don’t get a tight enough closure, the diaphragm will get loose and not work. Don’t worry if the blind cap doesn’t align as perfectly with the barrel as it might have done.

At this point, it is safe to try test filling it with water. Remember it takes 10 to 12 pumps to fill it all the way. If everything looks like it is working okay, the only thing left to do is to polish it to a beautiful luster. Personally, I think wet sanding works best on Parker Vacumatics, 2nd Generation Duofolds and 51s. Tune in this November for our wet sanding tutorial.

Here is our fully restored Parker Duofold from 1945. That wet sanding really makes it stand out

How Do I Restore a Sheaffer TouchDown

Fixing a Sheaffer TouchDown filler can be easy with a little practice. Personally, I love the functionality and simplicity of the design that uses pneumatics to collapse an ink sac and allow its natural vacuum to draw ink back into the pen.

Most of what you need to fix a Sheaffer TouchDown filler is right here in this photo.

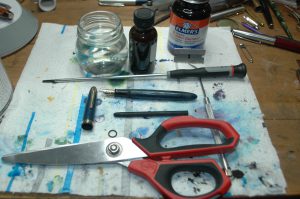
In the first photo, you will see almost all that you need to restore a Sheaffer TouchDown filler. We forgot to include a bottle of “Super Lube: O-Ring Silicon Lubricant.” In case you have trouble seeing the photo, you will need: a Sheaffer TouchDown-filling pen, a long-shaft flathead screwdriver, dental pick, scissors, razor blade, a size 15 latex rubber ink sac, an O-ring, sac shellac, rubber cement and jar of room-tempeture water. A couple of Q-tips, paper towels, corn starch and a wooden dowel might also be useful.

To get started, unscrew the cap from the fountain pen, and stick the pen nib first in water. You do not want to soak the entire pen in water, just up to the division between the section (finger-grip part) and the blue barrel of this pen. Let it soak for anywhere from an hour to overnight. This leaches out most of the old ink and softens any possible glue a past repairer might have used to secure the threaded section to the barrel.

Once the pen is finished soaking, dry it off with a tissue or paper towel. Frequently these pens can unscrew without any assistance from section pliers. Grip the section (finger grip) between your thumb and forefinger on one hand and the barrel with your other hand. Unscrew the section with a steady, gentle pressure counterclockwise (lefty loosey.)

When the section unscrews, you will see the “sac protector” and inner remains of the ink sac come out with the section. The sac protector is friction fit, and you can remove it simply by pulling straight back. Some times the old ink sac has petrified and stays on the section nipple. Sometimes it is in pieces inside the sac protector. Sometimes the old sac has melted to the inside of the sac protector. The first two scenarios are very easy to manage. The melted sac takes a long time to remove. Q-tips, wooden dowels or anything else you can use to safely scrape the inside of the sac protector clean will help. It is very important to remove all the debris from inside the sac protector to allow the new sac to slide in and operate properly.

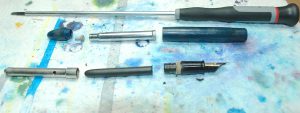
This photo shows a complete disassembled Sheaffer TouchDown pen.

After you have finished with the sac protector, unscrew the blindcap on the tail of the pen barrel and, if possible, pull the blind cap back as far as it will go. (Don’t force it if it is frozen inside the pen.) Now take the long-shaft flathead screwdriver and ease it up the barrel until you can feel the screw at the end of the barrel and metal tube. Turn the screwdriver slowly until you feel it find the slot of the screw. Hold the blind cap tightly with one hand and gently unscrew the screw to the left. You will feel the screw come free. It seems easiest to let gravity help it fall out on to your work bench. With some gentle pressure, the plastic blind cap will pop off the metal tube. Next, you push the tube back down and out the section-end of the barrel.

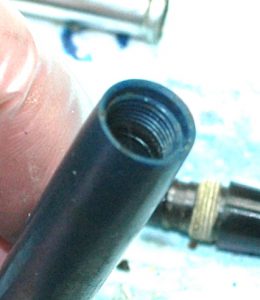
Until you get used to it, the trickiest part of the restoration is replacing the latex-rubber O-ring in the blindcap-end of the barrel. You can see the black O-ring imbedded in a groove of the barrel in this photo. If you are lucky, the O-ring will still have a little pliability and it will come right out with the help of the dental pick. If you are unlucky, the O-ring will have petrified, and you’ll have to carefully dig it out little piece by little piece.

Once the old O-ring is out, you might want to use a Q-tip to clean out any dirt in that end of the barrel. The barrel on TouchDowns are often still quite clean, and cleaning it with a Q-tip might not be necessary.

You can see the old O-ring inside this Sheaffer TouchDown barrel. Use a dental pick to carefully remove the old O-ring.

Sheaffer TouchDown fountain pens used one of two different size O-rings. Most pen-part suppliers list them as either a “small O-ring” or a “large O-ring.” Large O-rings were only used in first-year Sheaffer TouchDowns (1948), which have noticeably thicker barrels than the remaining “Thin Model” TouchDowns (1949-1952), which use small O-rings. If you ever feel like dabbling in Sheaffer Snorkels, the large O-rings are also used on PFMs and Snorkel Desk Pens.

I find it is easiest to place the new O-ring into its groove with the dental pick. I fold the O-ring a little and insert it into the blind-cap opening. Then I use the dental pick to carefully get one side of the O-ring into the groove. If all goes well, I use the dental pick to drag the opposite end of the O-ring into the groove. With two-points in the groove, I go the next high point of the sack and work it into the groove. Once that is accomplished, I try to get the last high point of the O-ring into the groove. It sounds easy, but it takes some practice to do it quickly. NEVER lube the O-ring before trying to install it. A slippery O-ring will make your life miserable.

Now it is time to start reassembling the barrel apparatus. Clean off the metal tube you had to unscrew from the blind cap with a paper towel to get any old shmutz off. Then drop the screw threads-first down the tube. Use the screwdriver to help find the tube’s hole for the screw. Leave the screwdriver in the tube slotted into the screw. Put a thin layer of silicon O-ring lube around the shoulder of the tube on the screw-end of the tube. Then insert the screw and tube, screw first, into the section hole of the barrel and gently glide it with the screwdriver all the way through the blind-cap side’s hole in the barrel until the tube won’t go any farther. Rest the barrel and tube on its side with the screwdriver still slotted into the screw.

Take the plastic blind cap and fill its cup with rubber cement. (There should be a rubber washer in there, but often it is blown and the rubber cement acts as a sealant that can replace it.) You might find a way that works better for you, but I hold the blind cap with the rubber cement in my left hand and pick up the barrel assembly by the screwdriver with my right hand. It gets a little messy, but I then screw the screw into the blindcap. You know you have found the screw hole in the blind cap when you see the tube going into the blind cap’s cup and rubber cement starts smooshing out. It is important to make sure the screw is in tightly, but you have to be very careful not to overtighten the screw because it can split the blind cap in half and make it useless for the necessary air seal to make the filler work. It is important for the tube to be extended all the way to prevent the rubber cement from getting into the O-ring. Wipe the excess rubber cement off with a paper towel. Now you can work the tube back and forth to spread the silicon lube around the O-ring and get smooth operation from the barrel assembly.

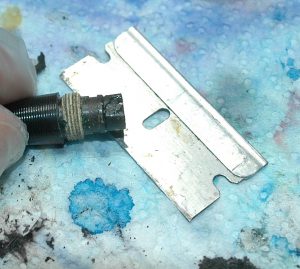
Here you can see where the hardened ink sac has been scraped off to reveal the nipple underneath.

Getting back to the section assembly part of the pen, take the razor and clean the usually hardened old ink sac off the nipple of the section. Be very careful not to accidentally chip off a piece of the nipple. That will ruin your pen. Some people will insist you need to give the nib assembly a sonic cleaning at this point, but if you soaked it long enough, you likely already removed most of the old ink.

To move forward, you need to trim your ink sac to fit perfectly into the sac protector. I don’t have a definitive way to do this. I usually stick the sac (closed end first) in the sac protector, pinch it at large opening of the sac protector, pull out the sac from the protector while maintaining the pinch and then trim it with scissors. Make sure the nipple on the section is dry. Put the sac on the nipple and then put the ink sac protector over the sac to see how well it fits. If the sac is a shade too long, trim it just a bit more. If the sac is a millimeter or so short, that is perfectly fine. Remove the sac protector and then ink sac. Paint a thin layer of sac shellac on the nipple of the section and then replace the properly trimmed ink sac. Wipe off the excess shellac and let the assemble dry for a few minutes. Next rub down the ink sac with pure talcum powder (old skool and potentially cancerous, as talc is mined with naturally occurring asbestos) or corn starch. The corn starch (or death talc) helps preserve the rubber. Snap the sac protector into place over the sac.

Final assembly is easy. Screw the section back into the barrel in a clockwise (righty tighty) fashion. Some old manuals say that you should put rubber cement on the threads (you can see the remains of old rubber cement on the starting photos) to help seal the barrel, but it isn’t necessary and only gives future restorers a bigger headache. The threads seal the section and barrel nicely on their own.

At this point, you have a pen that is ready to write. I, generally, give the pen 24 hours to let the shellac set completely. Then I test it with water, flushing out any remaining old ink while making sure it fills properly.

If you want it to looks its best, you can do a wet sanding that will remove a thin layer of the plastic, removing most surface scratches and stains. It also can enhance the color a bit. Unfortunately, it also makes the remaining imprint shallower or removes it entirely, which is a reason to be judicious in deciding which pens to wet sand. Yet, how to wet sand a pen is worthy of an article on to itself.

Apologies to a Parker 51

Time and again, I’ve mentioned the fountain pen that got me hooked into this crazy lifestyle. It was my mother’s father’s Sheaffer Balance Lifetime. Yet, I have another grandparental pen that never gets much publicity. It is a Parker 51 from my father’s side of the family.

This Parker 51 once belonged to either my father’s mother or father. I suspect it was Granddad’s, but either way it is a treasured keepsake.

The Parker 51 showed up in my life about 15 years after the Sheaffer. It was right around the year 2000. My father’s mother was getting sick and had to live with my parents. As they packed up her house, they discovered a Parker 51 in a desk drawer. They knew I liked old pens and sent it to me in Montana. At the time my collection was meager. My only other pens were a Sheaffer Imperial, a Rotring, a Waterman Phileas, Lamy Safari and Cross Townsend.

I recently pulled out the aforementioned 51 to write a letter and was struck by how little I knew about pens in 2000, when it showed up in my life. It would be several more years before I learned how to restore pens. I had never heard of a Parker 51. I had heard of Parker Duofolds because I had seen a modern Parker Duofold MacArthur Special Edition at Marshall Fields in Chicago. It was well out of my price range, and although its literature mentioned the original Duofolds, I assumed that none were left in existence! Honestly, I assumed that my Sheaffer was such a rare treasure that no other old-fashioned fountain pens could possibly exist. Good Lord, when I saw that modern Duofold in 1994, I was 18, and my 60-year-old pen might well have been what the dinosaurs wrote with.

That’s how little I knew. The internet only barely existed. I didn’t know a single soul who liked fountain pens. My parents thought they were archaic and messy. My friends parents thought the same. My relatives thought the same. I had not stumbled into any of the early pen catalogs and mailing lists. Only bank presidents wrote with Montblanc 149s to show off. In my tiny world, I was the last hold out.

Enter the 51, and my ignorance was on full display. It still worked and had an Aerometric filler with a silicon (sorry, pli-glass) ink sac. I assumed it was some deranged promotional pen my grandmother must have gotten in the 1980s for one of her many charitable donations. It didn’t look like a vintage pen to me. I didn’t know how to look for and understand a date code then. I didn’t know that the 51 was originally released in 1941 with the advertising stating that it was 10 years ahead of its time! The design certainly fooled me, as I thought it was from the 1980s. The date code that I now understand said it was made in 1950.

My paternal grandparents were both very formal people. The black barrel and lustraloy cap could have belonged to either of them, but as my grandmother was far more into flowery and feminine design, this pen, I now understand, was likely my grandfather’s.

My granddad, as he was called, died when I was only 8 or 9 years old. I never got to know him very well. He was always nice, but he was of a generation and upbringing that children were meant to be seen and not heard. He wasn’t the type of guy to romp around on the floor with me, but I don’t have any bad memories. As I grew up, I learned he had a business in professional sales in New York City. He was into electronics, fast cars, Broadway, a little bit of baseball and cocktail parties with witty conversation. As an adult, I’m surprised at how much we have in common, and I wish I could have known him as an adult. Our similarities baffle my own father, who wonder’s how his father’s tastes could have so completely skipped a generation.

My own father and I share the love of writing. My dad prefers ballpoints and typewriters to fountain pens and computers, but, hey, nobody’s perfect. All the same, I don’t think my grandfather likely wrote much besides orders, quite possibly on carbon copy paper. This might explain why the Parker 51 has such a firm extra-fine nib. The pen barely looked used when I got it. I suspect Granddad put it away as soon as he could get his hands on reliable ballpoint pens. I wonder if in the things left behind were a first or second-year Parker Jotter. I can see him zipping down the road in his much-beloved candy-apple red 1955 Ford Thunderbird and a Parker Jotter in his shirt pocket.

Of course, it would be nice to have that Thunderbird or any one of the myriad Lincoln Continentals that he drove over the years. I am very happy with his pen, but he sure had great taste in cars, too.

How Do I Re-Sac a Vintage Pen

You can’t make an omelette without breaking a few eggs, the old saying goes, and it is true for learning how to fix vintage pens. Today, we are going to learn how to restore a lever-filling fountain pen…or re-sac it, as they say. But first, you are going to have to get used to the concept that you’re going to destroy a few pens along the way—even if you’re careful.

Find a few good, cheap vintage pens to practice restoring before experimenting with more expensive models. This deformed Sheaffer Balance 350 is a great starter pen.

When you are starting out, don’t begin with an unrestored version of your grail pen. Find some broken-down cheap pens such as Wearevers, Esterbrooks or even this banana’d Sheaffer 350 Balance. The longer you are on the hunt, the more you will find vintage pens that turn into the shape of bananas. The deformation happens when the pen is left in the sun or near a heater for too long, which warps the plastic/celluloid.

In addition to a good practice pen, you will need some ink sacs, a pair of spark-plug/section pliers, a long dental pick, sac shellac or rubber cement, scissors that can cut through rubber ink sacs, a jar or cup, clean water, polish, a cloth rag, paper towels, a hairdryer, a razor blade and, if at all possible, an ultra-sonic cleaner. You can get most of these items pretty cheaply. One trick of the professionals is to buy a pair of rubber coated spark-plug pliers, instead of formal “section pliers” that you can find on many pen restoration sites. Why? Spark-plug pliers can be had for less than $10 at most auto parts stores. Section pliers are almost always the same, exact pliers but marked up to $20 or $30. In the early days of pen restoration as a hobby in the 1970s and ’80s, a lot of guys used regular pliers and cut off two one-inch sections of hose to cover the teeth of their normal pliers. That’s how I was first taught.

Attempting to keep this simple, I’m going to break this down into what I hope are very simple steps to make this as fun and easy an experience as possible.

  1. I like small mustard or baby food jars to use for filling with just enough water to get the pen wet from the tip of the nib to just over the threads of the barrel.

    Fill a cup with just enough room-temperature water that you can stick your pen in and go just a little bit over the section and past the cap threads. (Sections are the writing grip into which the nib and feed are inserted in one end.) Let it soak for at least an hour. (Never use hot water.) This leaches out a lot of the dried old ink in the nib and inkfeed, while also potentially softening any glue or shellac used to hold the section tightly into the barrel. Many of the old factory repair manuals encouraged repairmen to use a dab of sac shellac to hold the sometimes loose pressure-fit sections into the barrel. WARNING: Water is necessary, but it also isn’t your friend. Black hard rubbers turn chocolatey brown in water fairly quickly. (An hour might be too long for some rubbers.) Some celluloids get more brittle or discolored when in water too long. Be sure to dry off the pen as soon as you remove it from the water.

2. Use the hairdryer to warm up the space where the section and barrel meet. DO NOT melt the plastic or set the celluloid on fire. All you need is a little warm to the touch. Until you get comfortable, keep the heat to barely noticeable to the touch. Grip the section, and only the section, with your rubber coated pliers. Very gently and slowly begin to twist counter clockwise as you hold the barrel in your other hand. It is common to hear some very scary cracking sounds. Usually, that sound is the petrified rubber ink sac in the pen breaking apart as you open. Sometimes it is the pen barrel breaking. Experience will teach you the difference. If you feel the section coming loose,

Grip only the section with rubber coated pliers, such as these spark-plug pliers. Don’t grip too tightly, just enough not to let go.

keep twisting slowly and gently. If you do not feel it turning or you feel it actively resisting, stop twisting. Some sections—especially Parker Duofolds and Vacumatics—were threaded into the pen barrels, which is why we usually start with a twist. Most pens of all brands were straight pressure-fit sections. HOWEVER, some brands—especially Wahl-Eversharp, although they were extremely inconsistent—used little pins in the barrel or section to hold the section firmly in place. You CANNOT twist those sections without destroying the barrel or section. If a section resists twisting, hit it with a little more heat and very gently start trying to wiggle it in teeny, tiny side-to-side motions while pulling straight out.

This is the most dangerous part of the entire restoration job. This is where probably 80% of all pens break, if they are going to break. ALSO, celluloid is insanely flammable. DO NOT get it hot. If it catches fire, it burns like a magnesium flare. It is an extremely hot burning flame that burns extremely quickly. Early on, I accidentally set a Vacumatic on fire. It scared the hell out of me, and it was a miracle I didn’t burn down my house. Even after getting it under running water it didn’t go out right away. I had to drop it in the steel sink and flood it to put the fire out. In about 10 seconds, it burned away the majority of the barrel. Be careful with the heat.

Use a razor to scrape the old sac pieces off the section nipple.

3. Once the section is free, scoop out the old sac guts from inside the barrel with the dental pick. Sometimes those guts stick pretty good to the inside of the barrel. A flashlight or gun light can help you see in to make sure you got it all. Do not put water in the barrel to clean out the sac or old ink. This will likely ruin and rust-out the pressure-bar assembly.

4. Use the razor to scrape the remnants of the old ink sac from the nipple of the section. Be careful not to cut yourself or split open the nipple.

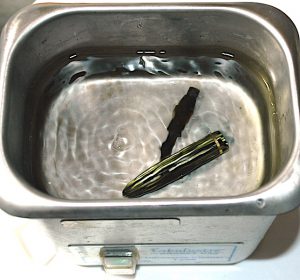
5. Fill your ultra-sonic cleaner with clean, room-temperature water. Sometimes a drop or two of ammonia will help badly clogged pens. Put enough water in to completely submerge the cap and section assembly. Before you turn it on, let the cap soak for a minute or so. This allows the water to penetrate the inner cap, where a lot of old ink is usually trapped. After the cap and section have had a minute to soak, turn on the ultra-sonic cleaner for no more than 2 minutes.

If feasible, an ultra-sonic cleaner is the easiest way to remove old ink.

You might not see a lot of “action” with your eyes, but the vibrations are practically violent to the parts that are submerged. It can shake free most of the old ink in two minutes or less. If a cap lip is cracked, I’ve seen some caps crumble in the ultra sonic cleaner. That’s how powerful it is.

NEVER stick your fingers in the ultra-sonic cleaner when it is turned on. It can damage your fingers and their joints. Also, don’t leave your parts in for much longer than two minutes because the cleaner will get hot and potentially damage or discolor your parts.

Turn off the ultra-sonic cleaner, collect your parts and drain the old dirty water. Then rinse the parts under the faucet with room temperature water for a few seconds. Shake the parts dry, and then dry them with a paper towel on the outside. Q-tips are perfect for drying and removing the remaining ink from inside the cap.

6. I like to polish the pen next, especially the nib. It allows me to see any major flaws I might need to work on, such as replacing the nib while the section is exposed. I use a pin-head dollop of MAAS metal polish on a Q-tip to get the nib shining like new. I use the clean side of the Q-tip to wipe off the remaining polish. Then I dip the nib in water and dry it with a clean rag to get off the remaining, invisible polish remnants. I repeat the process with a pea-size drop of MAAS metal polish on the rag and polish up the rest of the pen, rubbing it down several times with the clean parts of the rag…avoiding water.

Every repairman I know seems to have a different process for polishing a pen. The method above is adequate for most pens. Yet, if you’re a detail-oriented person, there are myriad methods of multiple polishes or wet sanding that do a much more factory-fresh looking job. Yet, those methods take up to an hour and are worthy of their own article.

This photo illustrates how to eyeball the spot you need to trim the ink sac.

7. Sizing an ink sac. How detail oriented are you? You can easily research what size sacs went into what pens. You can measure the nipple with a fine ruler using increments of 1/64th of an inch, the way old pen repair manuals did to find the right aperture width of the ink sac. Or, you can eyeball it.

The real trick to eyeballing it isn’t fitting the sac to the nipple but finding the right sac to fit inside the barrel. You do not want the edges of the sac to snug against the inside of the barrel. It is best if the sac can easily slide in and out of the barrel, preferably with a little space all around the sac. If one is to carry a pen in their shirt pocket, the goal is not to transfer body heat through the barrel to the sac and ink, which might effect the interior pressure of the ink in the pen and have it leak a bit on you with a full pen.

Regardless of how you choose the sac size, you will likely need to trim the ink sac before installing it. Most ink sacs are longer than the pen barrels. My rule of thumb is quite literally a rule of thumb. I stick the sac in the barrel as far as it will go. I then pinch the end of the barrel at the threads, with my thumb having just enough reach to go past the threads. Pinching awkwardly down on the sac, right where it exits the barrel, I remove the sac. Gaging where my thumb tip is, I trim the sac at the tip of my thumb. Usually, this allows just enough room for the section and nipple inside the pen so that the sac can be as long as it needs to be. You can double check the length by putting the section and sac next to the empty barrel, as they would fit inside it.

Use Talc to powder and preserve your new ink sac before final re-assembly.

8. Most modern pen restorers use orange shellac to affix the sac to the nipple. Before most of us learned how to make or knew where to find orange shellac for sale, rubber cement was the go-to adhesive. Orange shellac is nearly perfect, as it can harden and still be water soluble. Rubber cement forms a good seal at first but can be more easily effected by heat and aging. Yet, it better fills-in tiny hairline cracks in the nipple, hopefully extending the functional life of the pen. (NEVER use super glues of any kind. The rubber ink sacs will give out long before the super glue ever does and you can ruin the pen by forever getting the section stuck in the barrel…or sticking other wrong parts together.)

On this pen, we painted only the nipple with a thin layer of shellac. Then we slipped the sac over it. After that, we dusted the sac with pure talcum powder, which helps to extend the life of the sac.

9. Fitting the section back into the barrel is the second most dangerous part of the restoration process. Sometimes the barrel opening shrinks while the section is out and cracks open if you put the section back in too quickly or roughly. If the section feels like it is having difficulty going back in, maybe warm up the barrel end a little and gently wiggle the section back into place. Although it doesn’t really matter, I like twist the section into place where the top of the nib is even with the lever on the pen.

Congrats! Your pen is fully restored, looking beautiful and ready to write.

If the section is too loose, you can tighten it up with a tiny cut out of a piece of onion-skin paper. Or, like the old repair manuals, you can use a small drop or two of shellac on the section. Just wipe off the excess shellac and keep it out of the threads.

10. Let the shellac dry. As the shellac is water soluble, I wait about 24 hours before I test the pen with water or ink. Once the shellac is dry and the pen tests well, you’re all done. Congrats!

It took longer to read this article than it likely will take you to restore a pen—at least once you get used to the process. Fixing and writing with vintage pens is my favorite part of the hobby. If you like seeing how things work and getting your hands dirty, you’ll love pen repair. The only thing that improves it for me might be repairing pens while listening to a Cubs game on the radio and nursing a cold beer.

Always feel free to write in with questions. And always remember to go slowly and take your time. It isn’t a race. Enjoy the zen of pen repair, and best of luck to your future projects!

Vintage Pen Straight from 1905

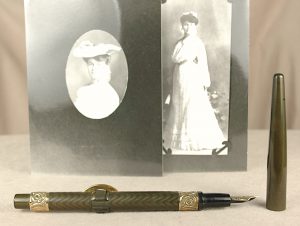
Susie Thomas was given this Conklin M31 in 1905 for her high school graduation. She looks way more sophisticated than most high school kids today.

It is the romantic in me that makes up the story behind an individual pen when I pick it up and look it over. Who owned it? What did it write about? What transpired in the years it chronicled?

We don’t have to wonder about that with our Conklin M31. We know it was given as a gift in 1905 to Susan Thomas. She had just graduated high school and was going to attend business college! We know this because her granddaughter Jane asked us to sell it.

These long-taper capped Conklin pens are extremely difficult to find today, as they usually lose their caps over time…or they break. The black hard rubber can be brittle. This pen is nearly mint…except for the chocolate hazing and #2 14k gold Conklin replacement nib. However, it is a FLEXI nib, which ought to make up for the few flaws.

Susie’s past is a little hazy. She went to business college, which was all but unheard of for a woman in 1905. She got married and had kids at some point, and Jane thinks she died in the 1940s.

Conklin M31 pens with their tapered caps are very rare and a real treasure with a flexi nib. It is even rarer to know its personal history.

Preliminary research shows (so far) that this pen was first issued in 1903. We restored it with a new ink sac. The gold-filled ring is monogramed with a script “T.” A great pen for a museum collection and use.

Sir Arthur Conan Doyle’s Elementary Gift

Most pen fanatics are familiar with Sir Arthur Conan Doyle, the famed author of the Sherlock Holmes stories, having once been an advertising spokesman for the Parker Duofold. However, that was at the end of his life.

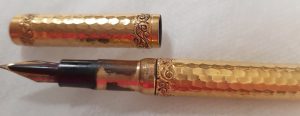
This Swan eyedropper was once a gift from mystery writer Sir Arthur Conan Doyle and his wife to James Holmes during the Christmas of 1910.

Before there was such a thing as a Parker Duofold, one can speculate about what pens he would have used. Well, if what he gave as decadent gifts are any clue, it might have been Swan pens!

As I have said many times before, one of my favorite parts about owning this business is meeting tons of awesome people from around the world. This past week I was contacted by Sharon in the UK, and she had a spectacular pen to share.

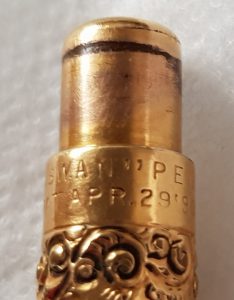
Here is the tail imprint on this Swan pen from 1910.

It was a Christmas gift her great grandfather, a coincidentally named James Holmes, received from “Sir Arthur and Lady Conan Doyle” in 1910. It appears to be a rolled gold Swan eyedropper with a hammered finish!

She is having it appraised by a famous auction house in London, but she also was hoping we might be able to come up with a reasonable figure. While I could come up with a reasonable number for such a pen without a famous inscription, I felt pretty confident a pen from the creator of Sherlock Holmes took it to the next level.

Any thoughts, Loyal Readers?

This shows the heavily worn section and nib of this Swan eyedropper given by the creator of Sherlock Holmes.

Was Norman Rockwell a Pen Addict?

With their passion for Parker overriding their desire to kiss under the mistletoe, clearly painter Norman Rockwell understood the obsession of pen collectors around the world. Happy Holidays!

With their passion for Parker overriding their desire to kiss under the mistletoe, clearly painter Norman Rockwell understood the obsession of pen collectors around the world. Happy Holidays!

Just one look at this vintage Parker ad, and you know that its painter Norman Rockwell understood pen collectors very well. Sure, it might look a little schmaltzy with two attractive young lovers ignoring one another’s lips under the mistletoe, but they just got new Parker 61s! Of course, they are geeked about their new treasures!

We, here at ThePenMarket.com, hope you get exactly what you want this holiday season!

With respect to all faiths and those without faith, have a Merry Christmas, Happy (belated) Hanukkah, a Joyous Kwanzaa, a Fun Festivus, a Super Solstice and a generally warm winter filled with peace and love.

May you get your heart’s desire.

Best wishes from all of us at ThePenMarket.com

Goodies from the Ohio Pen Show

November has been a crazy-busy month. First, I turned 40 near the start of the month. Friends flew in from Montana, and others locally joined in for much mirth and madness.

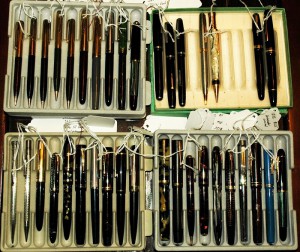
Here are three trays of new fountain pens for this website. Most of them are already fully restored!

Here are three trays of new fountain pens for this website. Most of them are already fully restored!

The following weekend saw me in Columbus, Ohio, enjoying their glorious pen show.

This weekend was Thanksgiving weekend.

I haven’t forgotten you, loyal readers. I’ve just been recovering and gearing up for a killer Cyber Monday and a spectacular holiday shopping season.

Ohio was wildly successful for all of the new connections, old friends and amazing pens. I finally got to meet the incredible nib specialist Richard Binder. I also met the legendary pen repairman Ron Zorn. Jonathan Veley gave me my first lesson in vintage pencil repair. A Mont Blanc specialist was able to assist in several specific repairs.

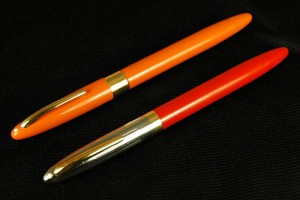
I picked up this mandarin orange Sheaffer Snorkel Statesman and Fiesta Red Clipper for my own collection, I love them

I picked up this mandarin orange Sheaffer Snorkel Statesman and Fiesta Red Clipper for my own collection, I love them


I scored more than 30 new pens for your perusal, and I picked up two rare color Sheaffer Snorkels. A mandarin orange Statesman and a fiesta red Clipper made my entire trip. Sorry, folks, I’m keeping those two for myself.

Yet of the 30+ new pens, there are ample rare colored 51 pencils to match up with any solitary pens in your collection. Pelikans, Parkers and Sheaffers make up the bulk of the collection. Yet, my favorite is a sky blue Conklin! It is difficult for me to resist it’s pull.

When Nipples Go Bad…Section Nipples, That Is

Once in a rare while, I find that the section of a pen has lost its nipple to attach an ink sac. Sometimes, an old nipple is just too heavily damaged to patch together or seat a bladder. On the vintage Wahl fountain pen below from the 1920s, the nipple actually was still attached to the remnants of the old ink sac but cleanly detached from the section.

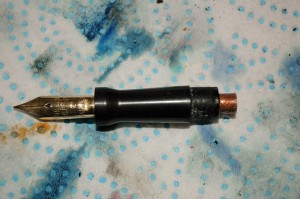
A piece of copper tubing has been fit into a vintage fountain pen section to serve as a nipple, to which you can attach a fresh ink sac.

A piece of copper tubing has been fit into a vintage fountain pen section to serve as a nipple, to which you can attach a fresh ink sac.

As Wahl sections from the 1920s aren’t easy replacement parts to find, I find it is best to jury rig a solution. This means it is time for a trip to McDonald’s or the local hardware store.

I have used a variety of objects such as straws (from McDonald’s) to metal pipes over the years. All it needs to be is strong enough to hold a shellacked ink sac.

In this case, the hardware store had a small copper pipe that fit perfectly. Luckily for the pen, the section hole was deep enough to accommodate the inkfeed at proper depth while allowing enough room for the  pipe to hold tight. If the feed rested above the hole, then I would have been out of luck.

To get started, use a rotary tool or hacksaw to cut the pipe to the proper length. Use said rotary tool or some heavy sand paper to smooth the newly cut piece. This keeps it from not fitting or from leaving sharp pieces to hurt the ink sac. Remember to keep the replacement nipple fairly short to avoid it coming into contact with the inner pressure bar or spring. If it is too long, it might trap the filling mechanism and not allow you to fill the pen.

Coat the outside of the tube with some rubber cement, before setting it down in the section. This will seal the microscopic gap between the section and tube if you have a good fit. Plus, rubber cement won’t harm the plastic or hard rubber. Nor will it stick so tightly that you cannot remove the new nipple for any reason.

Make sure no rubber cement is clogging the inkfeed channel, preventing you from using the pen you have worked so hard to restore.

After everything is clear, use a little more rubber cement to affix the new ink sac. As long as you keep the pen away from heat, which you should always do anyway, the rubber cement makes for a good seal for the bladder. Until orange shellac became more available to pen collectors in recent years, rubber cement had been the go-to sealant for putting on new ink sacs. As I wasn’t sure how much I could trust the shellac between metal and rubber surfaces, I went with the old standby that I knew I could trust.

Upon completing this. let everything set and dry for 24-hours. Test it with water or ink to make sure the seals are good. If the pen goes for another 24-hours on its side without any leaks in the nipple, section or sac, you are good to go.

If the sac will fill but cannot retain any fluid, then there is an air leak you will need to find and seal. It might be a well hidden hairline crack elsewhere in the section. It also could be a hole in the ink sac, which is unlikely. Mostly it will be a gap somewhere between the section and the new nipple.

Once everything is tested and holding, put the rest of the pen together as you would any other repair job.

SPECIAL REMINDER: DO NOT force a piece of metal tubing into the remaining hole. Metal tubes are stronger than old hard rubber or plastic. It will crack your remaining part if forced into place.. If that happens, it is time to find a new pen to work on. Be careful.